AI animated projection mapping for FTI's club of the future
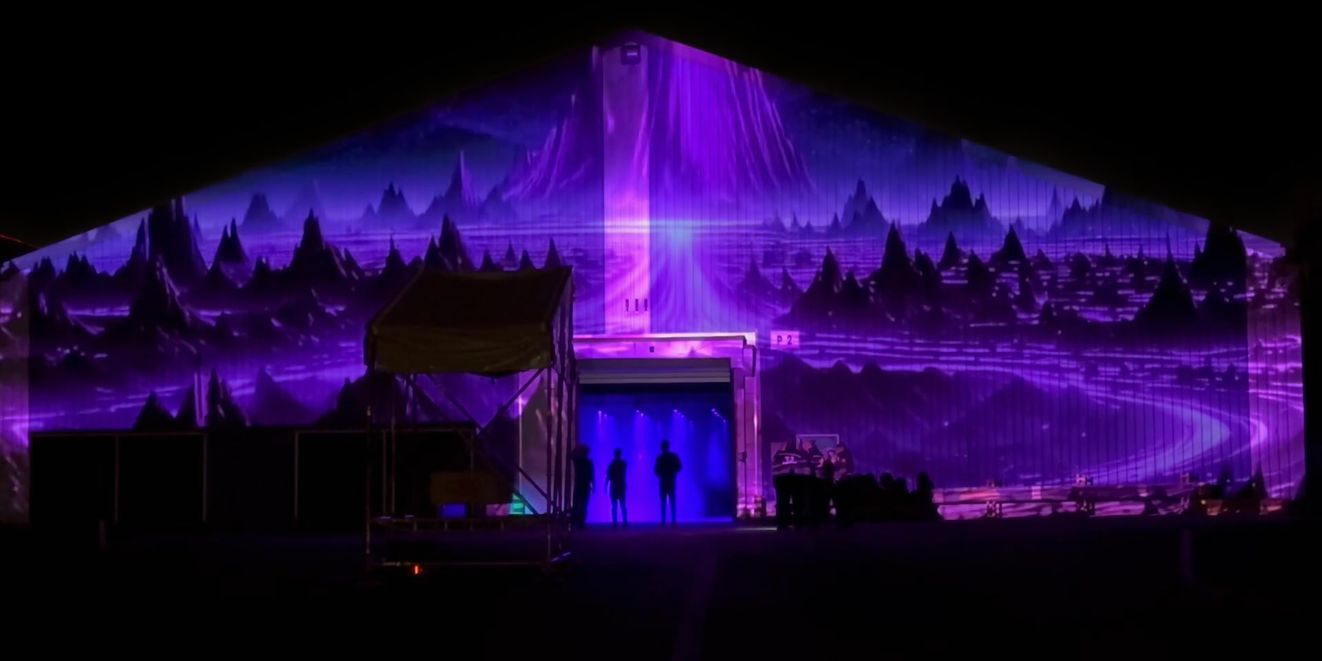
A part of the FTI event in Kortrijk, was FTI’s club of the future. After doing the static AI generated projections on the Belfort a couple of months ago, my Howest Devine colleague Frédéric Baert and I were asked if we wanted to do a projection mapping on the building of the club of the future. Naturally, we said yes, but we also wanted to take the opportunity to explore animated AI content.
We were already familiar with Deforum, a tool that allows you to create animations using AI. A big problem with Deforum is that the generated animations have a lot of flicker, it’s an aesthetic on it’s own, but not what we were looking for.
These last couple of months, we saw a lot of good work being created with AnimateDiff, so we wanted to explore the possibilities of using it for this project.
Initial tests
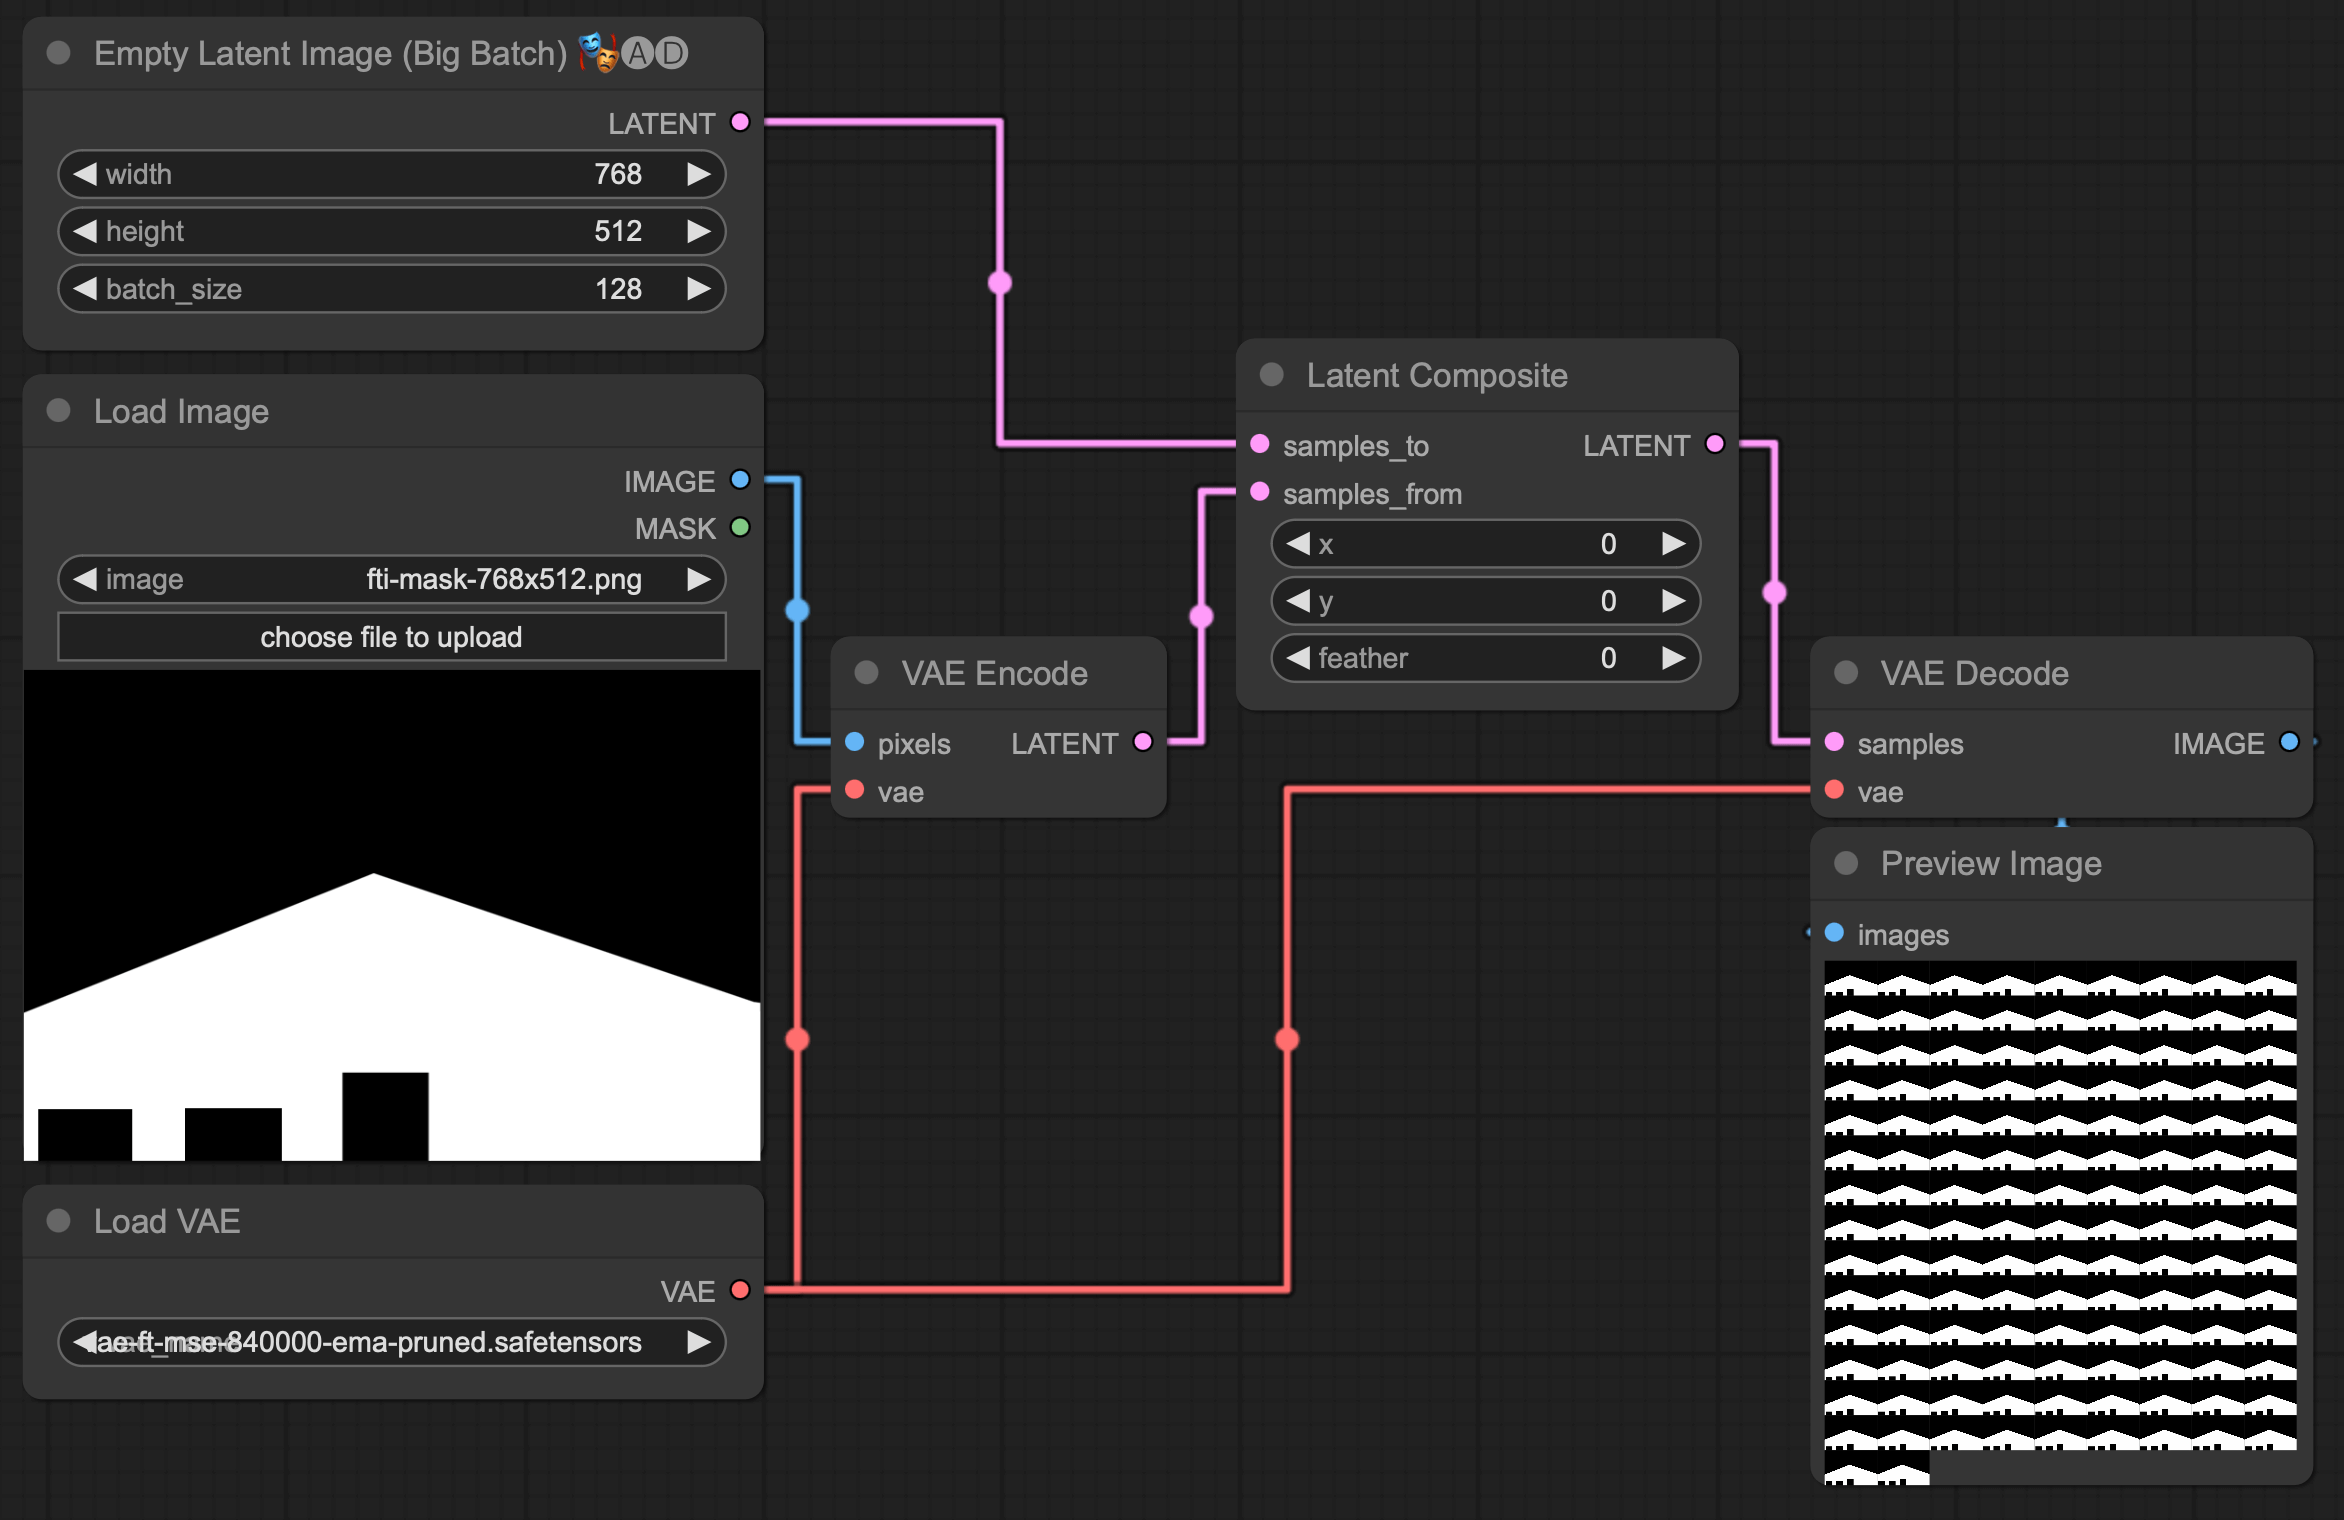
As a first, we explored combining AnimateDiff with (Controlnet QR Code Monster)[https://huggingface.co/monster-labs/control_v1p_sd15_qrcode_monster], a canny edge controlnet and inpainting.
This resulted in an animation which was constrained within the building. However: we noticed the canny edge controlnet, even at low weights, had too much of an impact: the resulting animation lacked movement and detail.
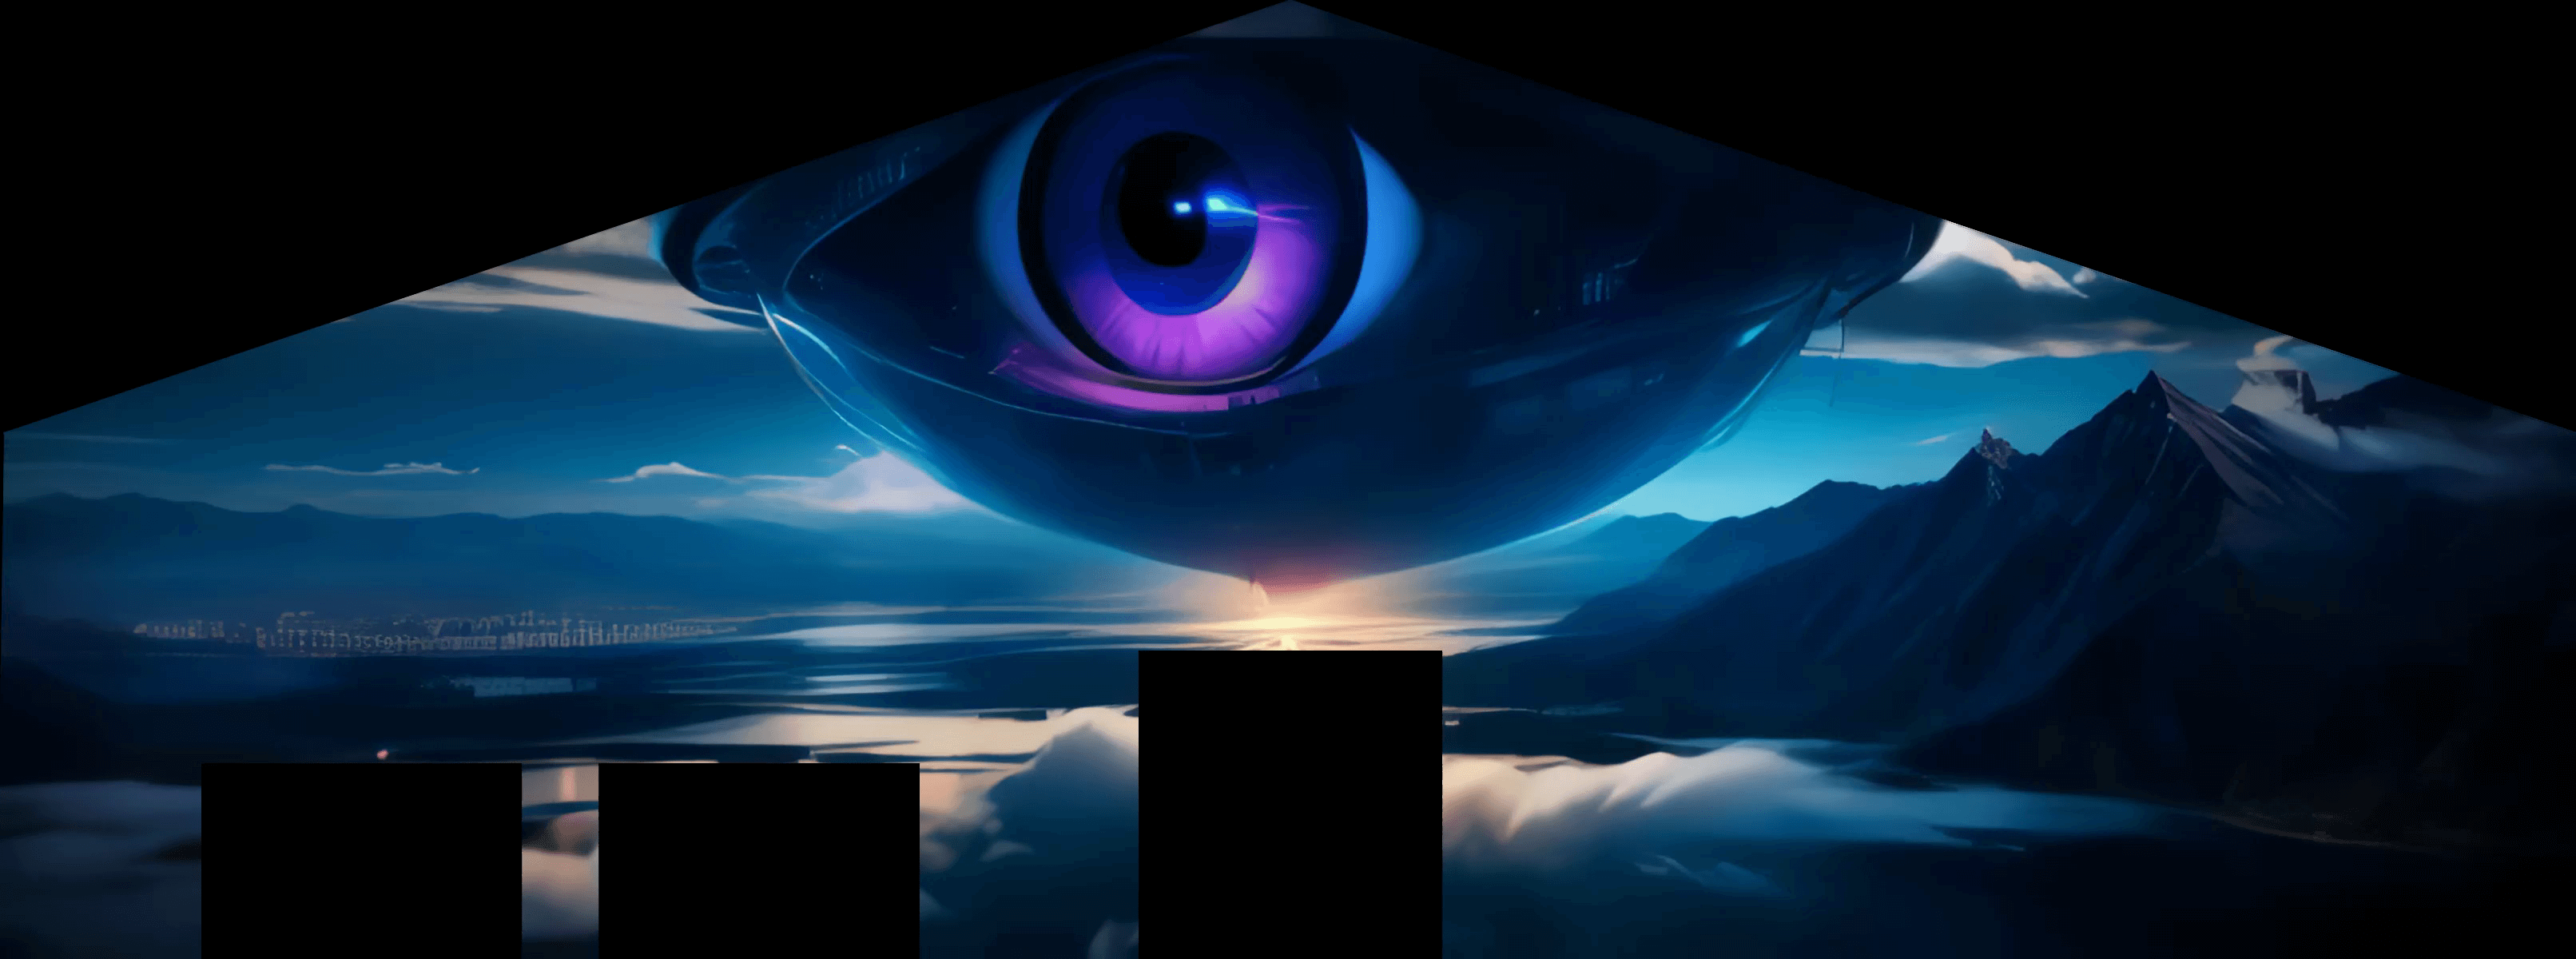
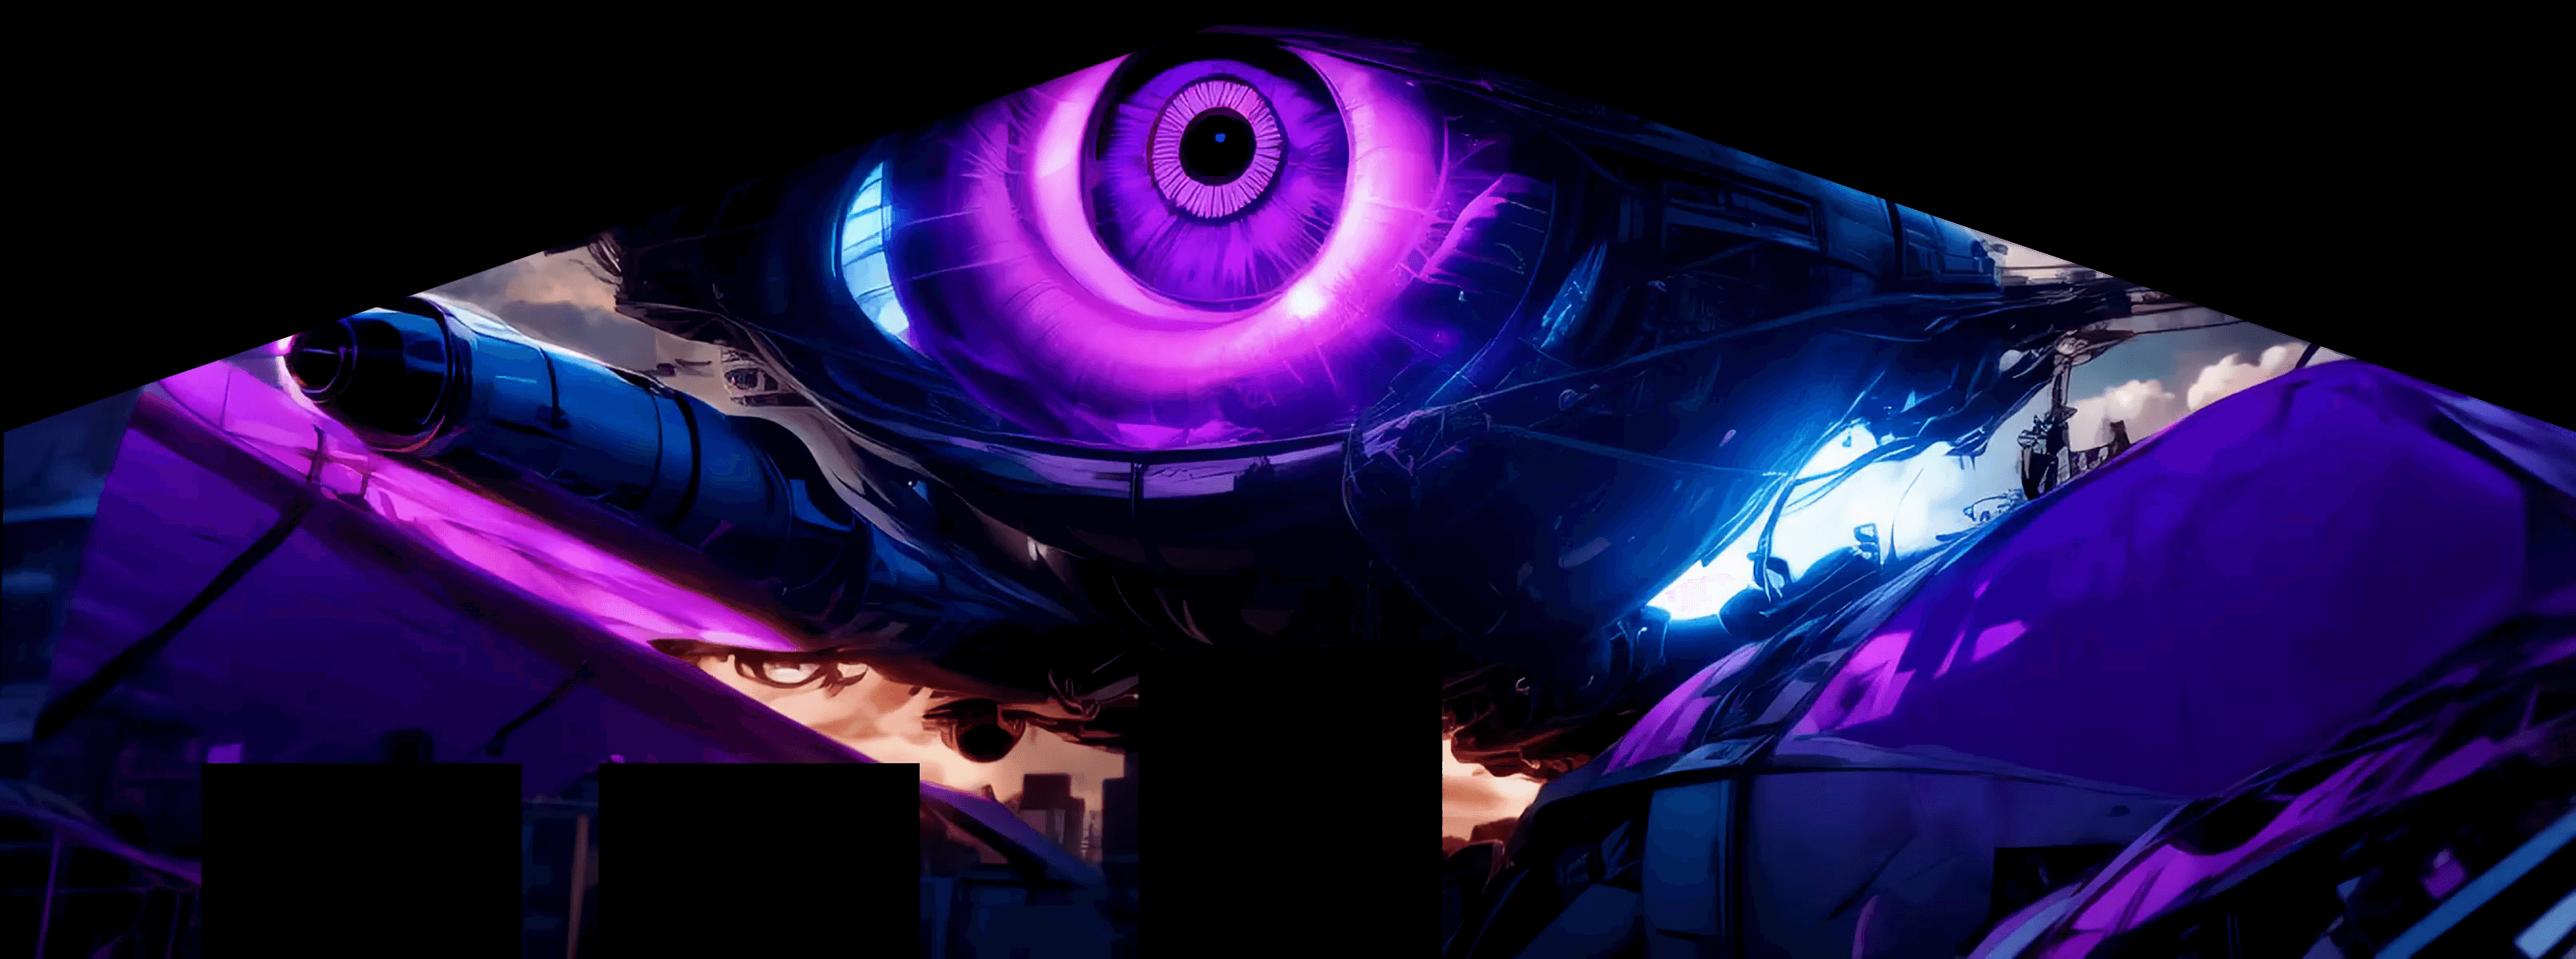
In the comparison below, you can see:
- the input controlnet at the top
- the output with both Canny and QRCode Monster in the middle
- the output with only QRCode Monster at the bottom.
While omitting the Canny Controlnet results in a more dynamic animation, it also introduced more artifacts around the edges of the building, as you can see in the video above: we’re getting these brown smudges on the building, most apparent on top of the gates.
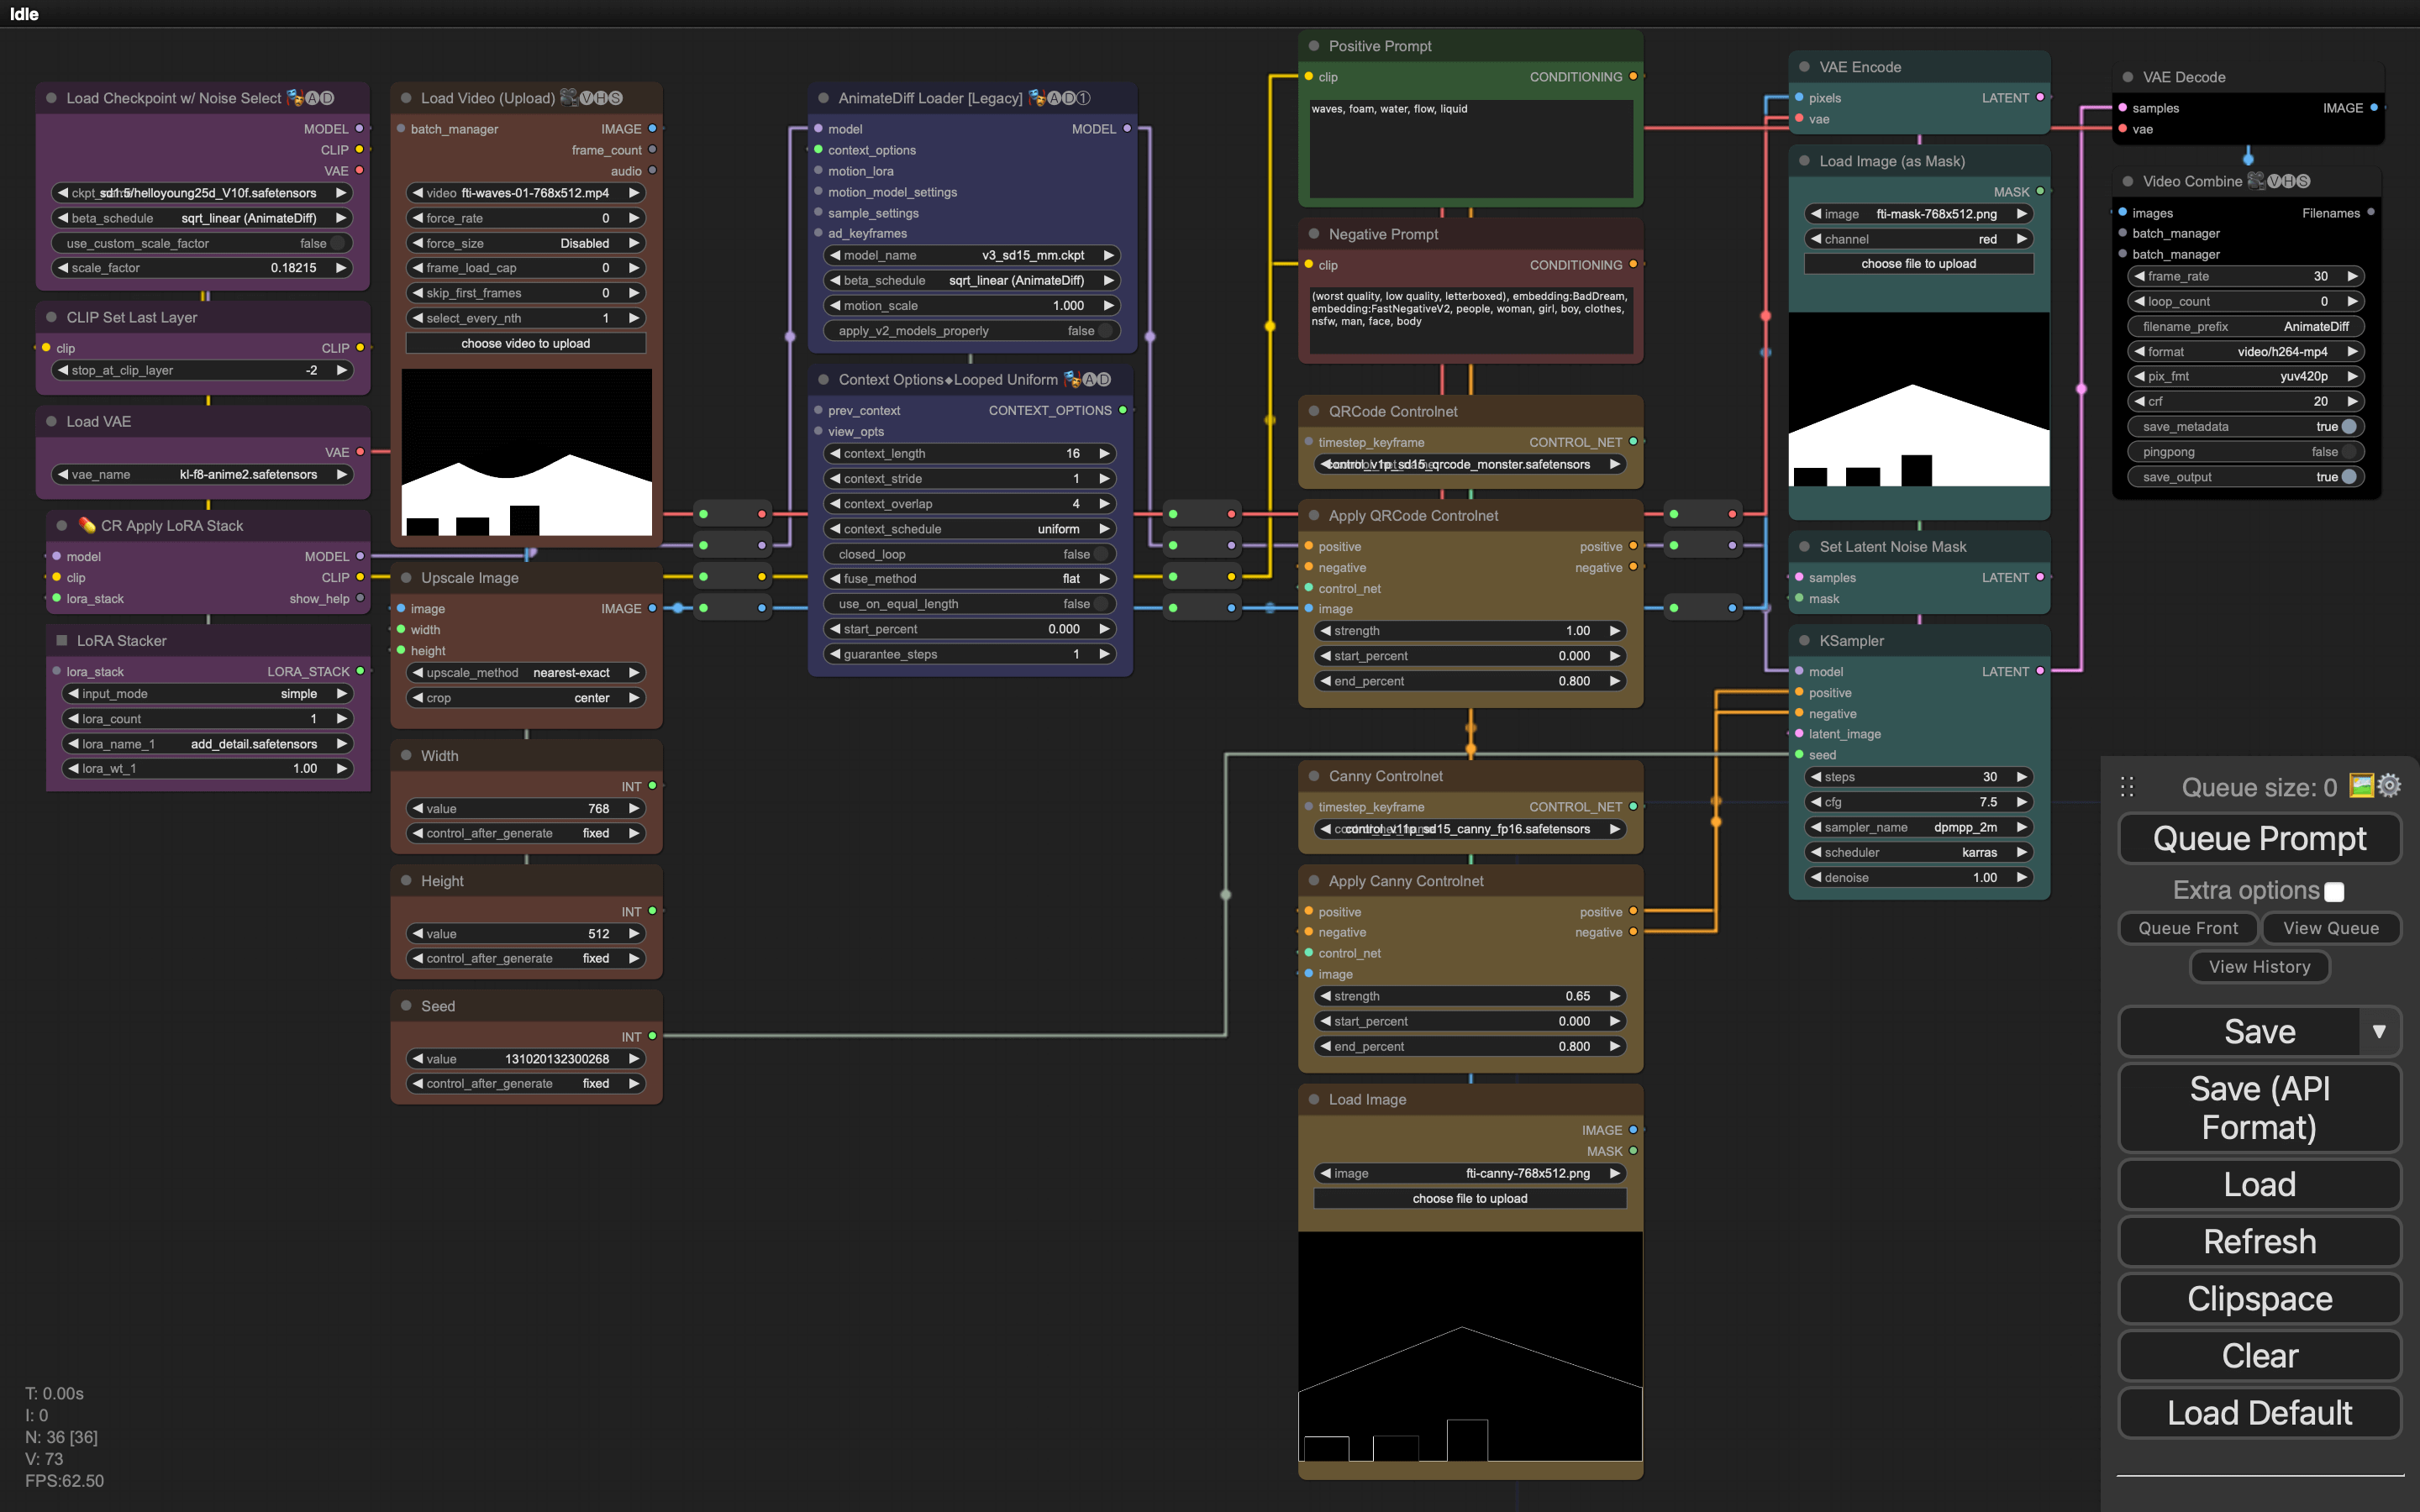
First I thought this was “beach” leaking into our waves prompt. But after some more testing, I figured out that VAE decoding an empty latent image, results in this brown color:
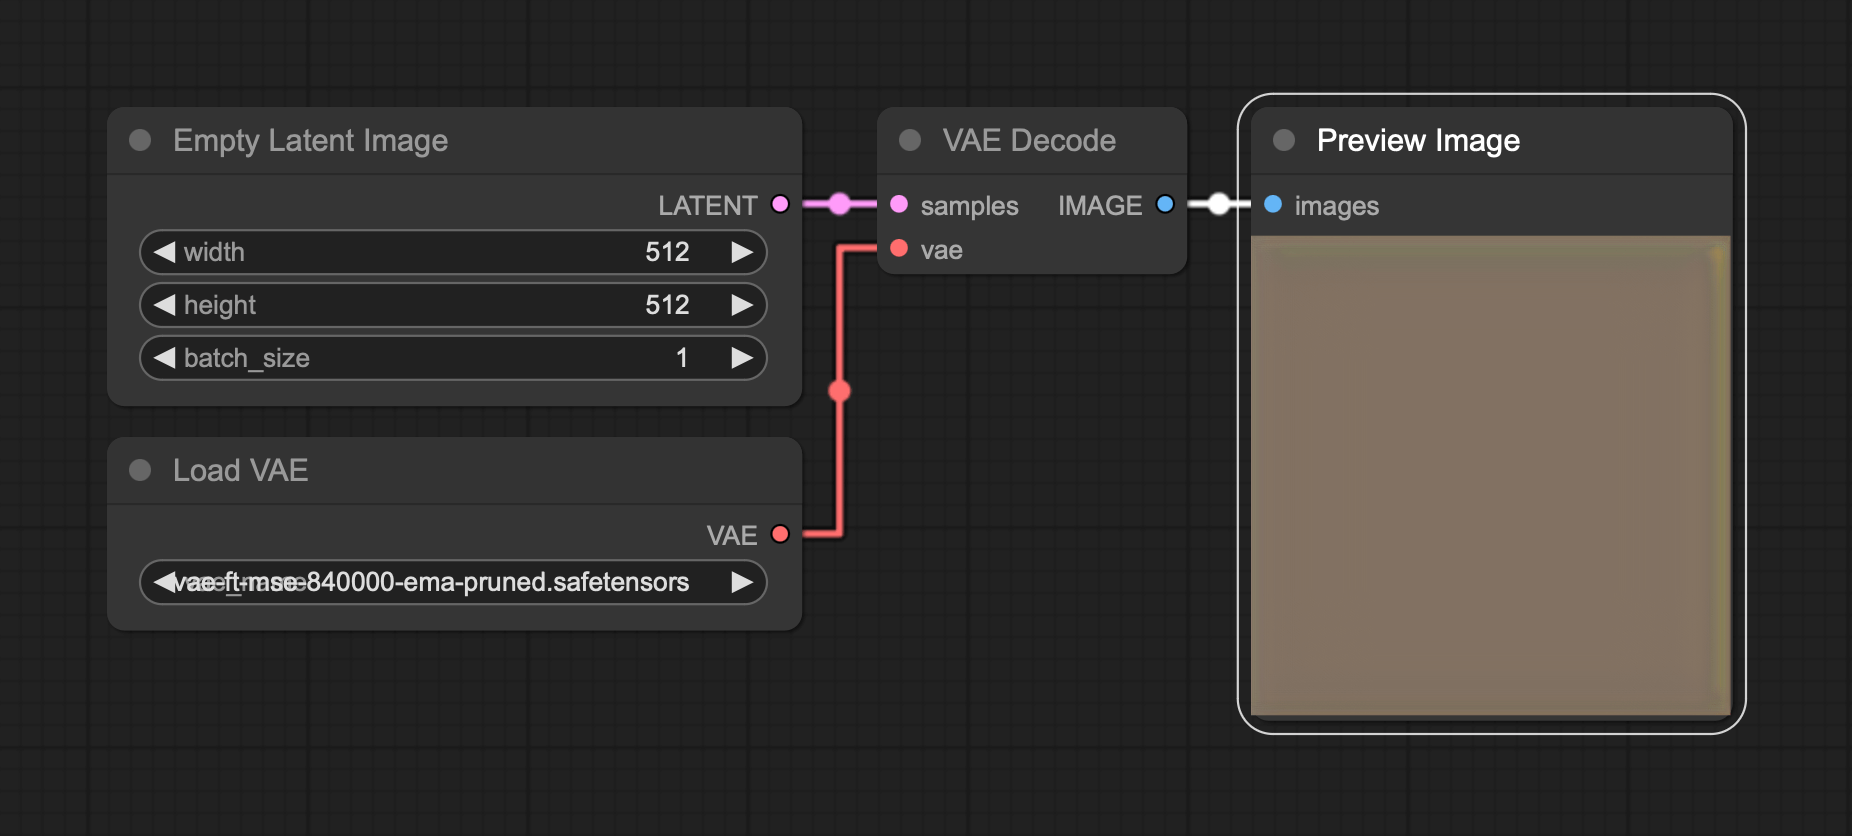
In order to fix this, we tried starting with the black-and-white mask image as the latent image instead. Now, in order to create a longer animation, we needed a large batch size of that black-and-white image. Unfortunately, the “Repeat Latent Batch” node is limited to max 64 images. Luckely, we were able to work around that limitation by combining the “Empty Latent Image (Big Batch)” node from ComfyUI-AnimateDiff-Evolved with a “Latent Composite” node:
Unfortunately, this didn’t solve the brownish borders issue. It also had a negative impact on the amount of animation happening in the generated content:
Even playing with different AnimateDiff noise types (default, FreeNoise, constant, …) didn’t solve the issue. It looked like we had to find another solution to generate interesting animations within the contours of a building, without those ugly brown smudges around the edges.
We opted for a 2-step rendering process:
- Do a quick LCM-based render within an expanded masked area to get some initial moving content, still constrained to the (expanded) building.
- Do a second pass with a regular model, with a mask closer to the original mask. This way, the content that would have been brownish, will now be the LCM-based content instead, making it less apparent.
Finally, to get a better idea of how it would look on the building, we added a black + transparent overlay on top of the video using ffmpeg:
ffmpeg -i input.mp4 -i overlay.png -filter_complex "[0:v][1:v]overlay=0:0" output.mp4This way, we were able to create dynamic animations, which follow the shape of the building.
Style Consistency using IPAdapter
After getting our workflow layed out, we exchanged ideas with Ludovic Beun (Art Director) to nail down the look and feel of the animations. We had to make sure we hit the “Club of the Future” aesthetic.
To have some better control over the generated content + look and feel, we added IPAdapter to the workflow, to steer the model in a certain direction.
Upscaling
We used AnimateDiff v3 with SD 1.5 models, as this gave us the most creative and interesting animations. This limited us to using a resolution of no more than 768x512 pixels. The resolution we needed to reach for the projection was 3224 pixels wide, which is over 4 times the resolution of the generated content.
Going straight from 768x512 to 3224x2136 pixels with Topaz resulted in the following output:
While this works, and is quite fast (it upscales at about real-time speeds), the resulting image is bland and lacks detail. So, we decided to do a latent upscale first, to go from 768 pixels wide to 1.75x that resolution, and then do a Topaz upscale to reach the target resolution.
The result was a lot better:
It’s quite a bit slower (we went from a render time of 20 minutes to 1 hour for a 20 second clip), but we have a lot more details and contrast in the image.
Final renders
Our final workflow consisted of the following steps:
- An area to generate an IPAdapter Image. This allows us to work on a good text prompt before starting a longer animation render.
- A LCM-based render to get some initial moving content.
- A regular render to get the final animation.
- A latent upscale to get a higher resolution.
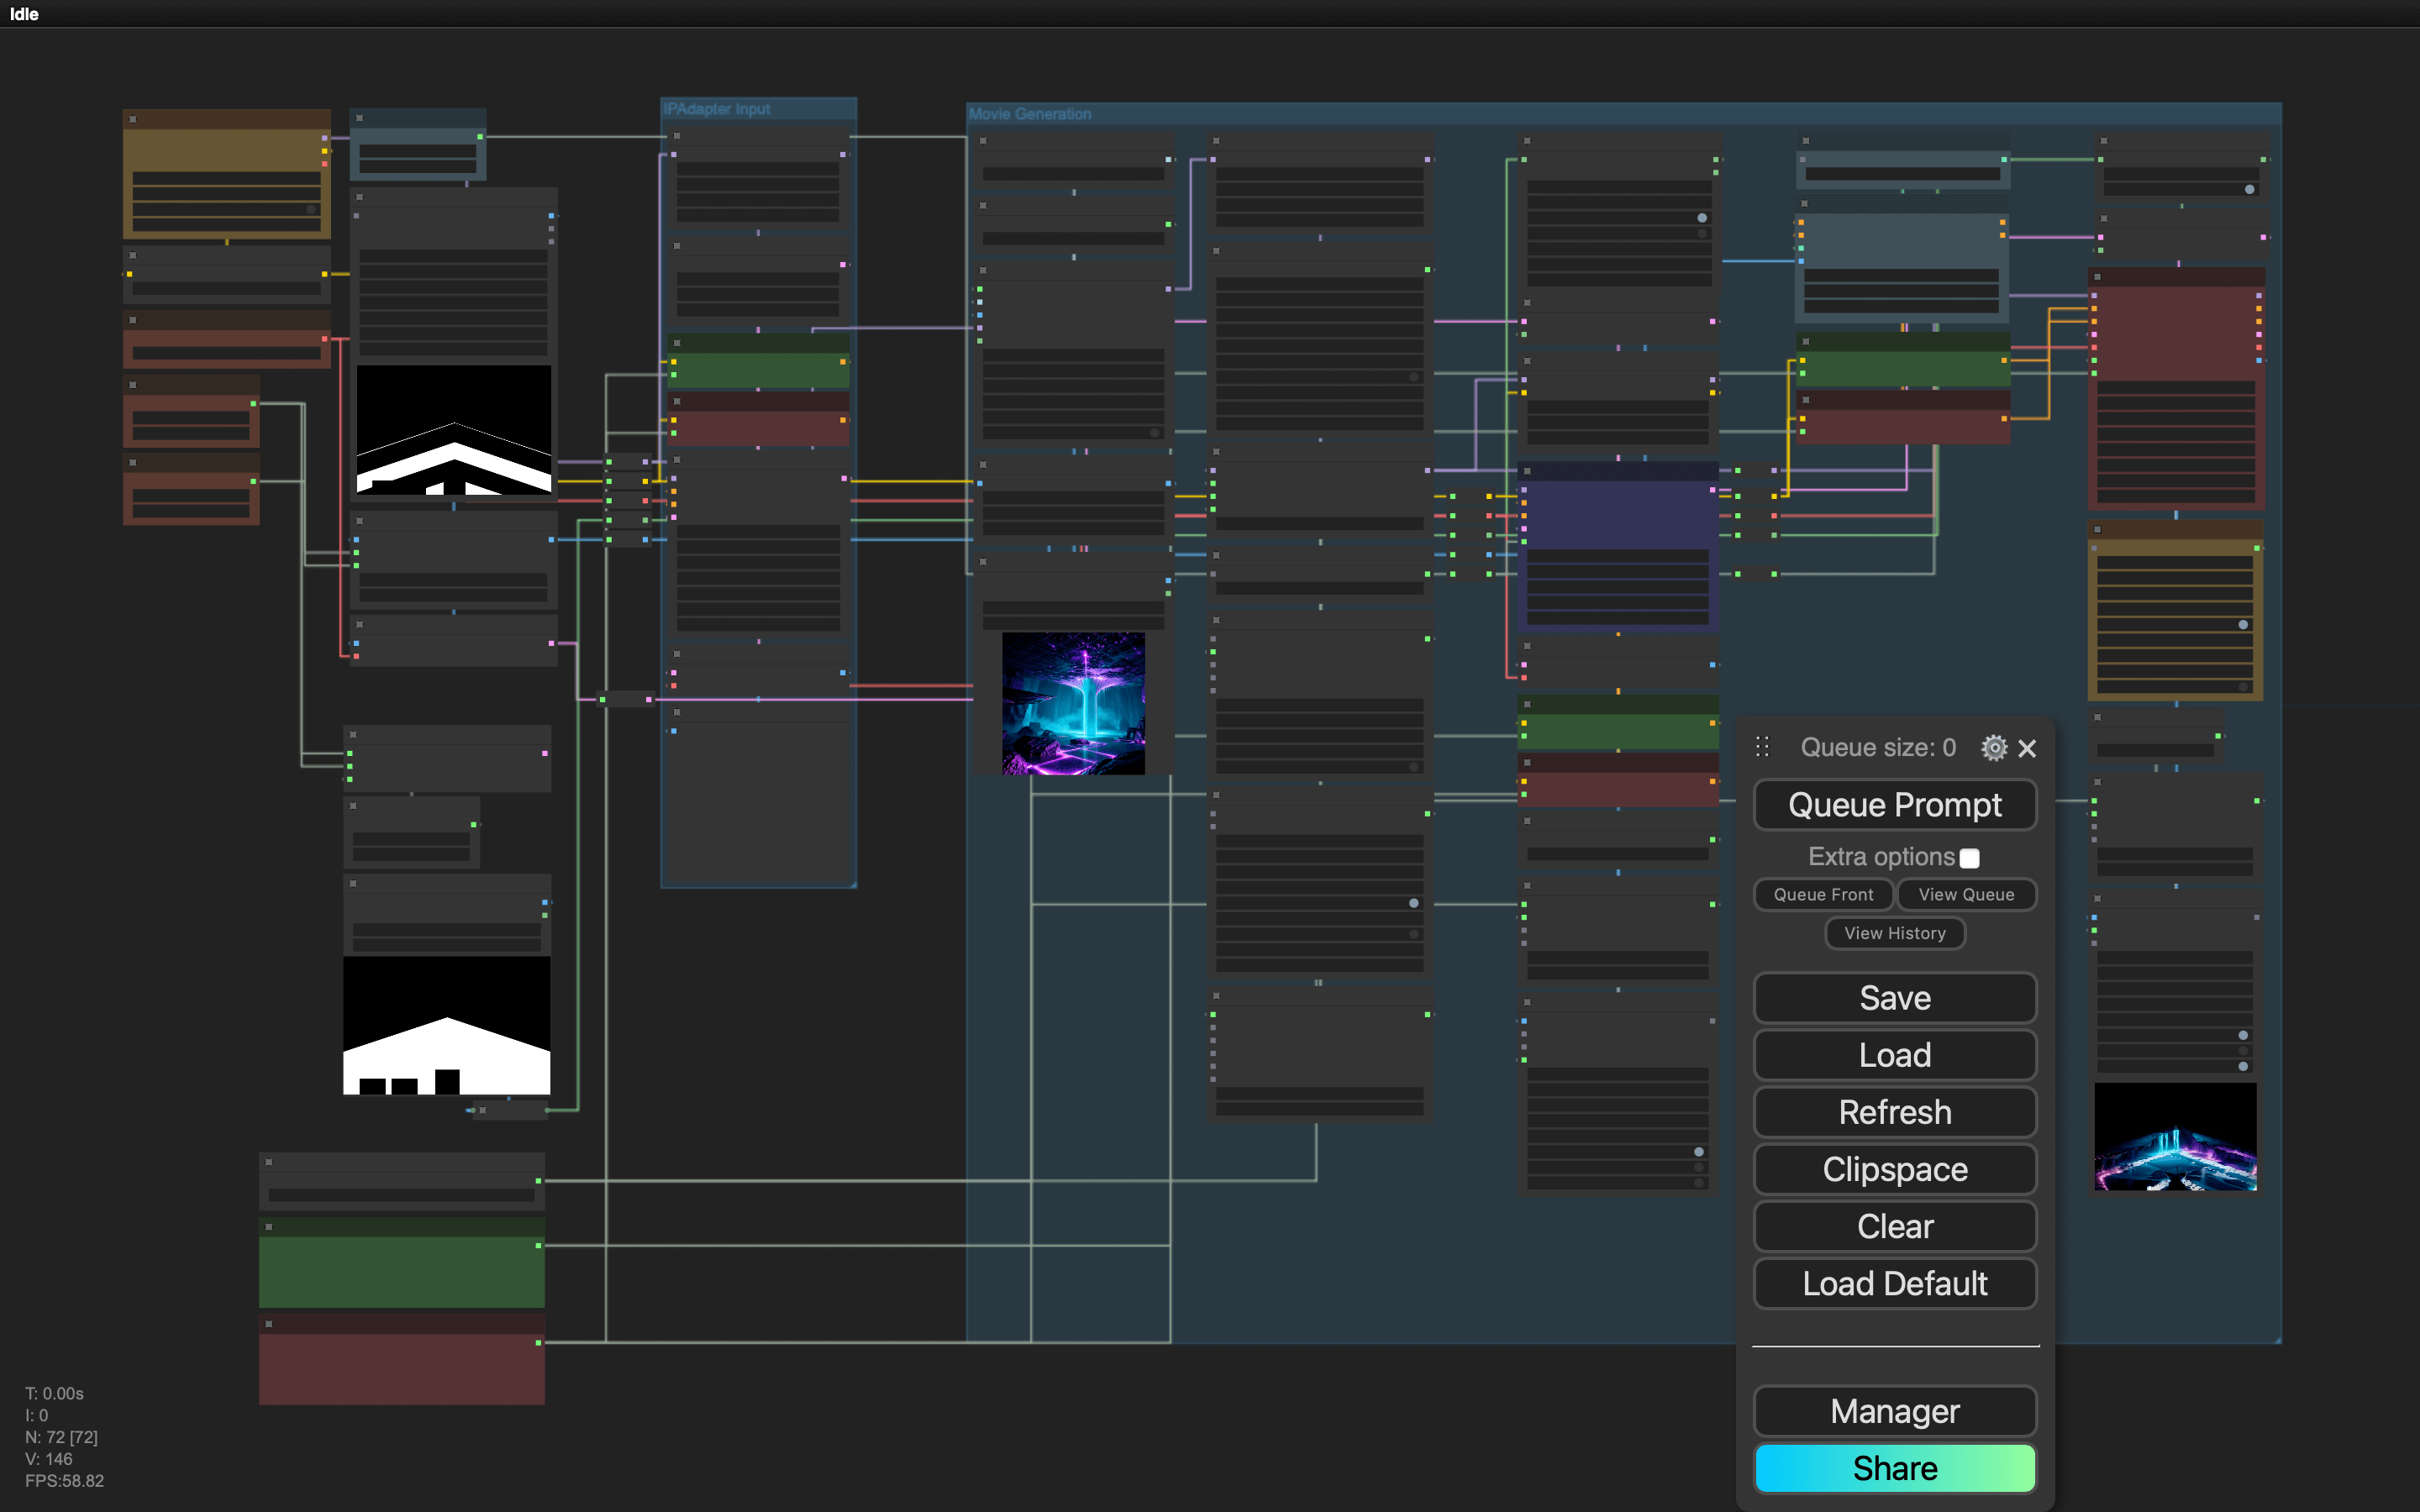
You can download our workflow here. Note: since last week there has been an update to the IPAdapter nodes, so you might need to change the IPAdapter nodes in the workflow.
We ended up with 15 different animations, each about a minute long. Some of the animations were slowed down with Topaz (as the building is huge and some of the animations were too fast), others were repeated (AnimateDiff can create seamlessly looping animations).
It was great collaborating with Frédéric again on this project: where I have a technical approach, he’s got the animation and design skills to make it look great.
You can check the final renders in the Youtube video below (make sure to select the highest quality, as the video is in almost-4K resolution):
I’ve also recorded some footage of the projection mapping, to give an impression of how it looked in real life: