Projection Mapping with Generative AI

Since 4 years, the program I’m teaching at (Devine) has been collaborating with Designregio Kortrijk on a yearly event called Wonder Kortrijk. Each year, we let our students work on assets for a projection mapping on a building in the city.
With the teachers, we also try to come up with something to project. For this year’s event, I’ve collaborated with my colleague Frédéric Baert on a project that uses generative AI to create a projection mapping. We gave ourselves 3 days to come up with a concept, and to create the content.
Testing Controlnets
As a first test, I built a ComfyUI workflow to play with different controlnets. Controlnet is a way to influence the output of a diffusion network, apart from text prompts. There are controlnets which allow you to input edges, normal maps, z-depth maps, posenet, etc…
I used the following prompt on the custom Dreamshaper 8 checkpoint, which is a Stable Diffusion 1.5 based model:
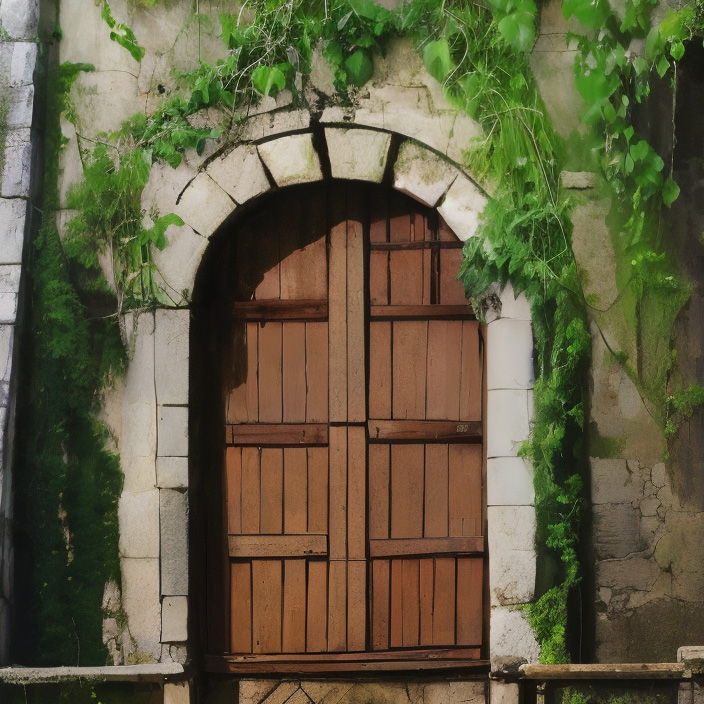
a medieval tower, vines running up the wall, jungle
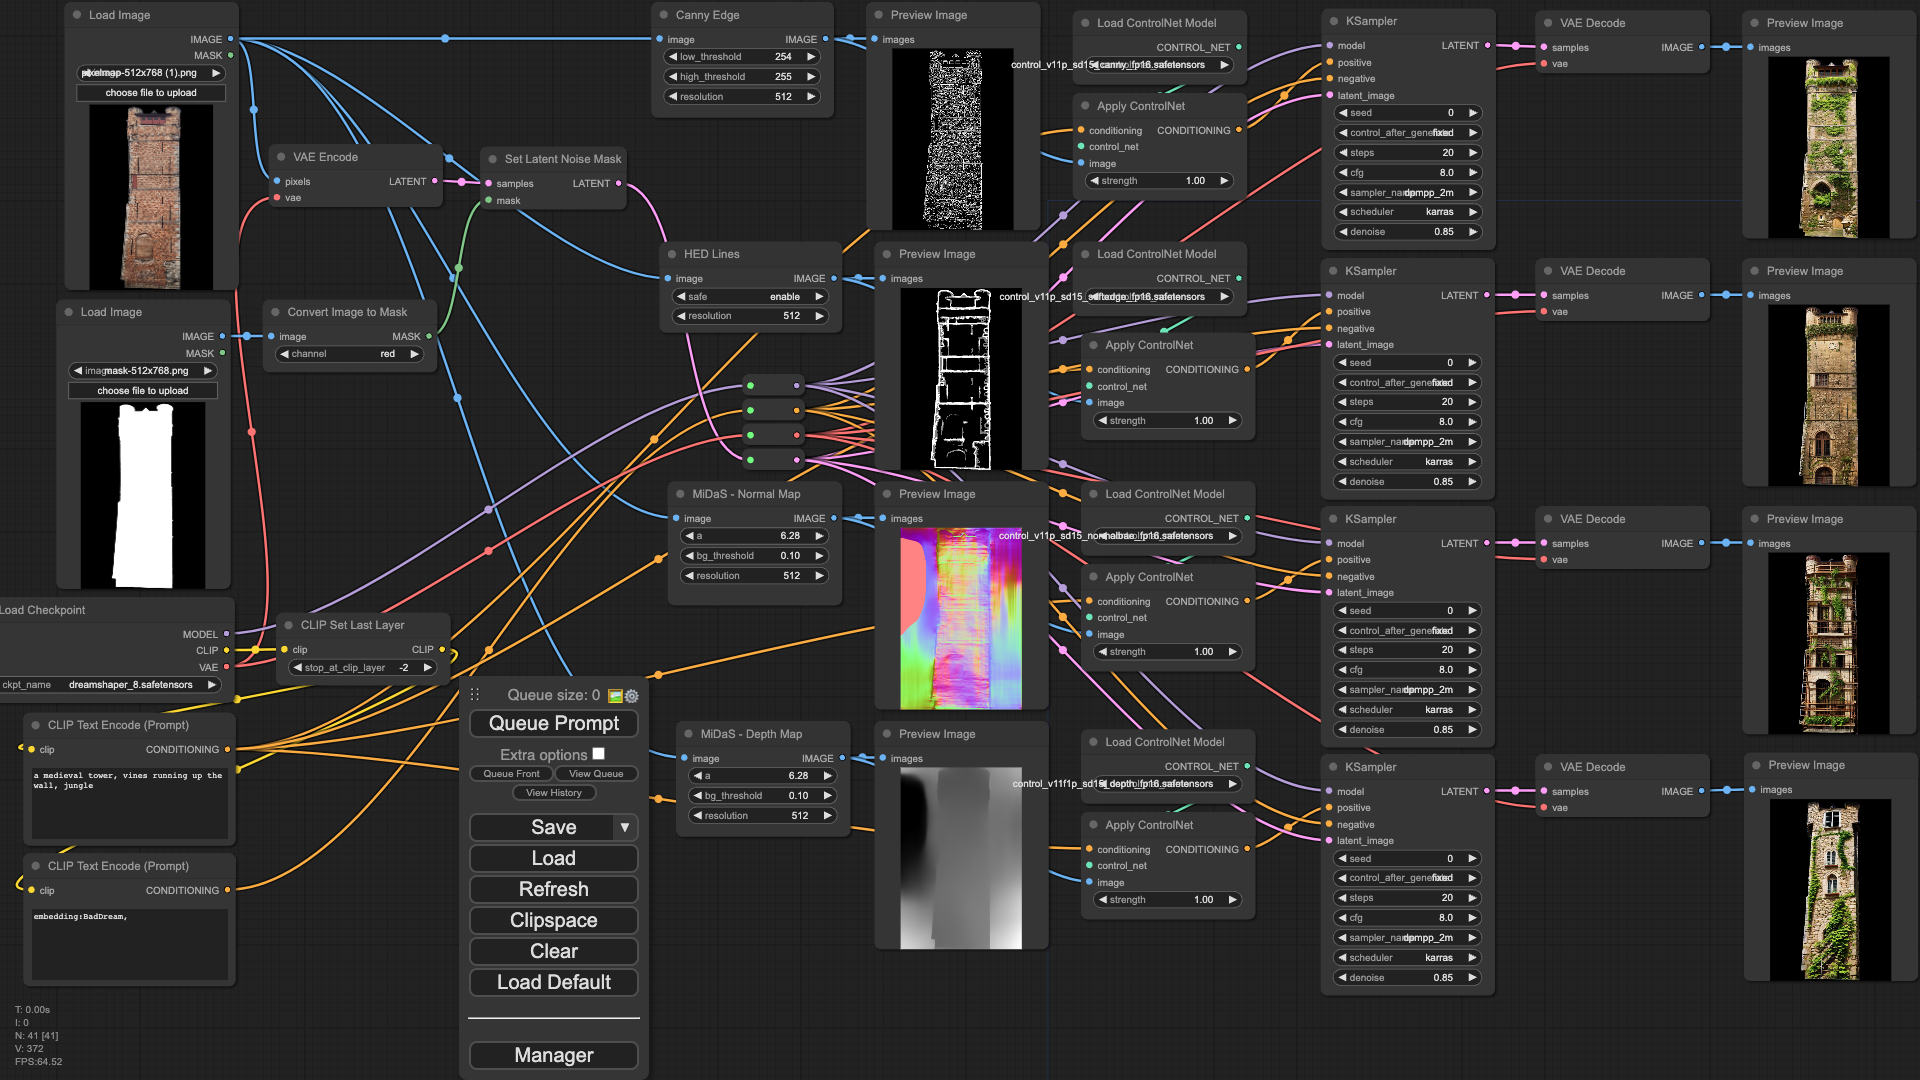
I got the best results using the Canny Edge and the HED Lines (Soft Edge) Controlnets. These images sticked to the original building lines enough to be able to project on the building, playing with the features of the building.
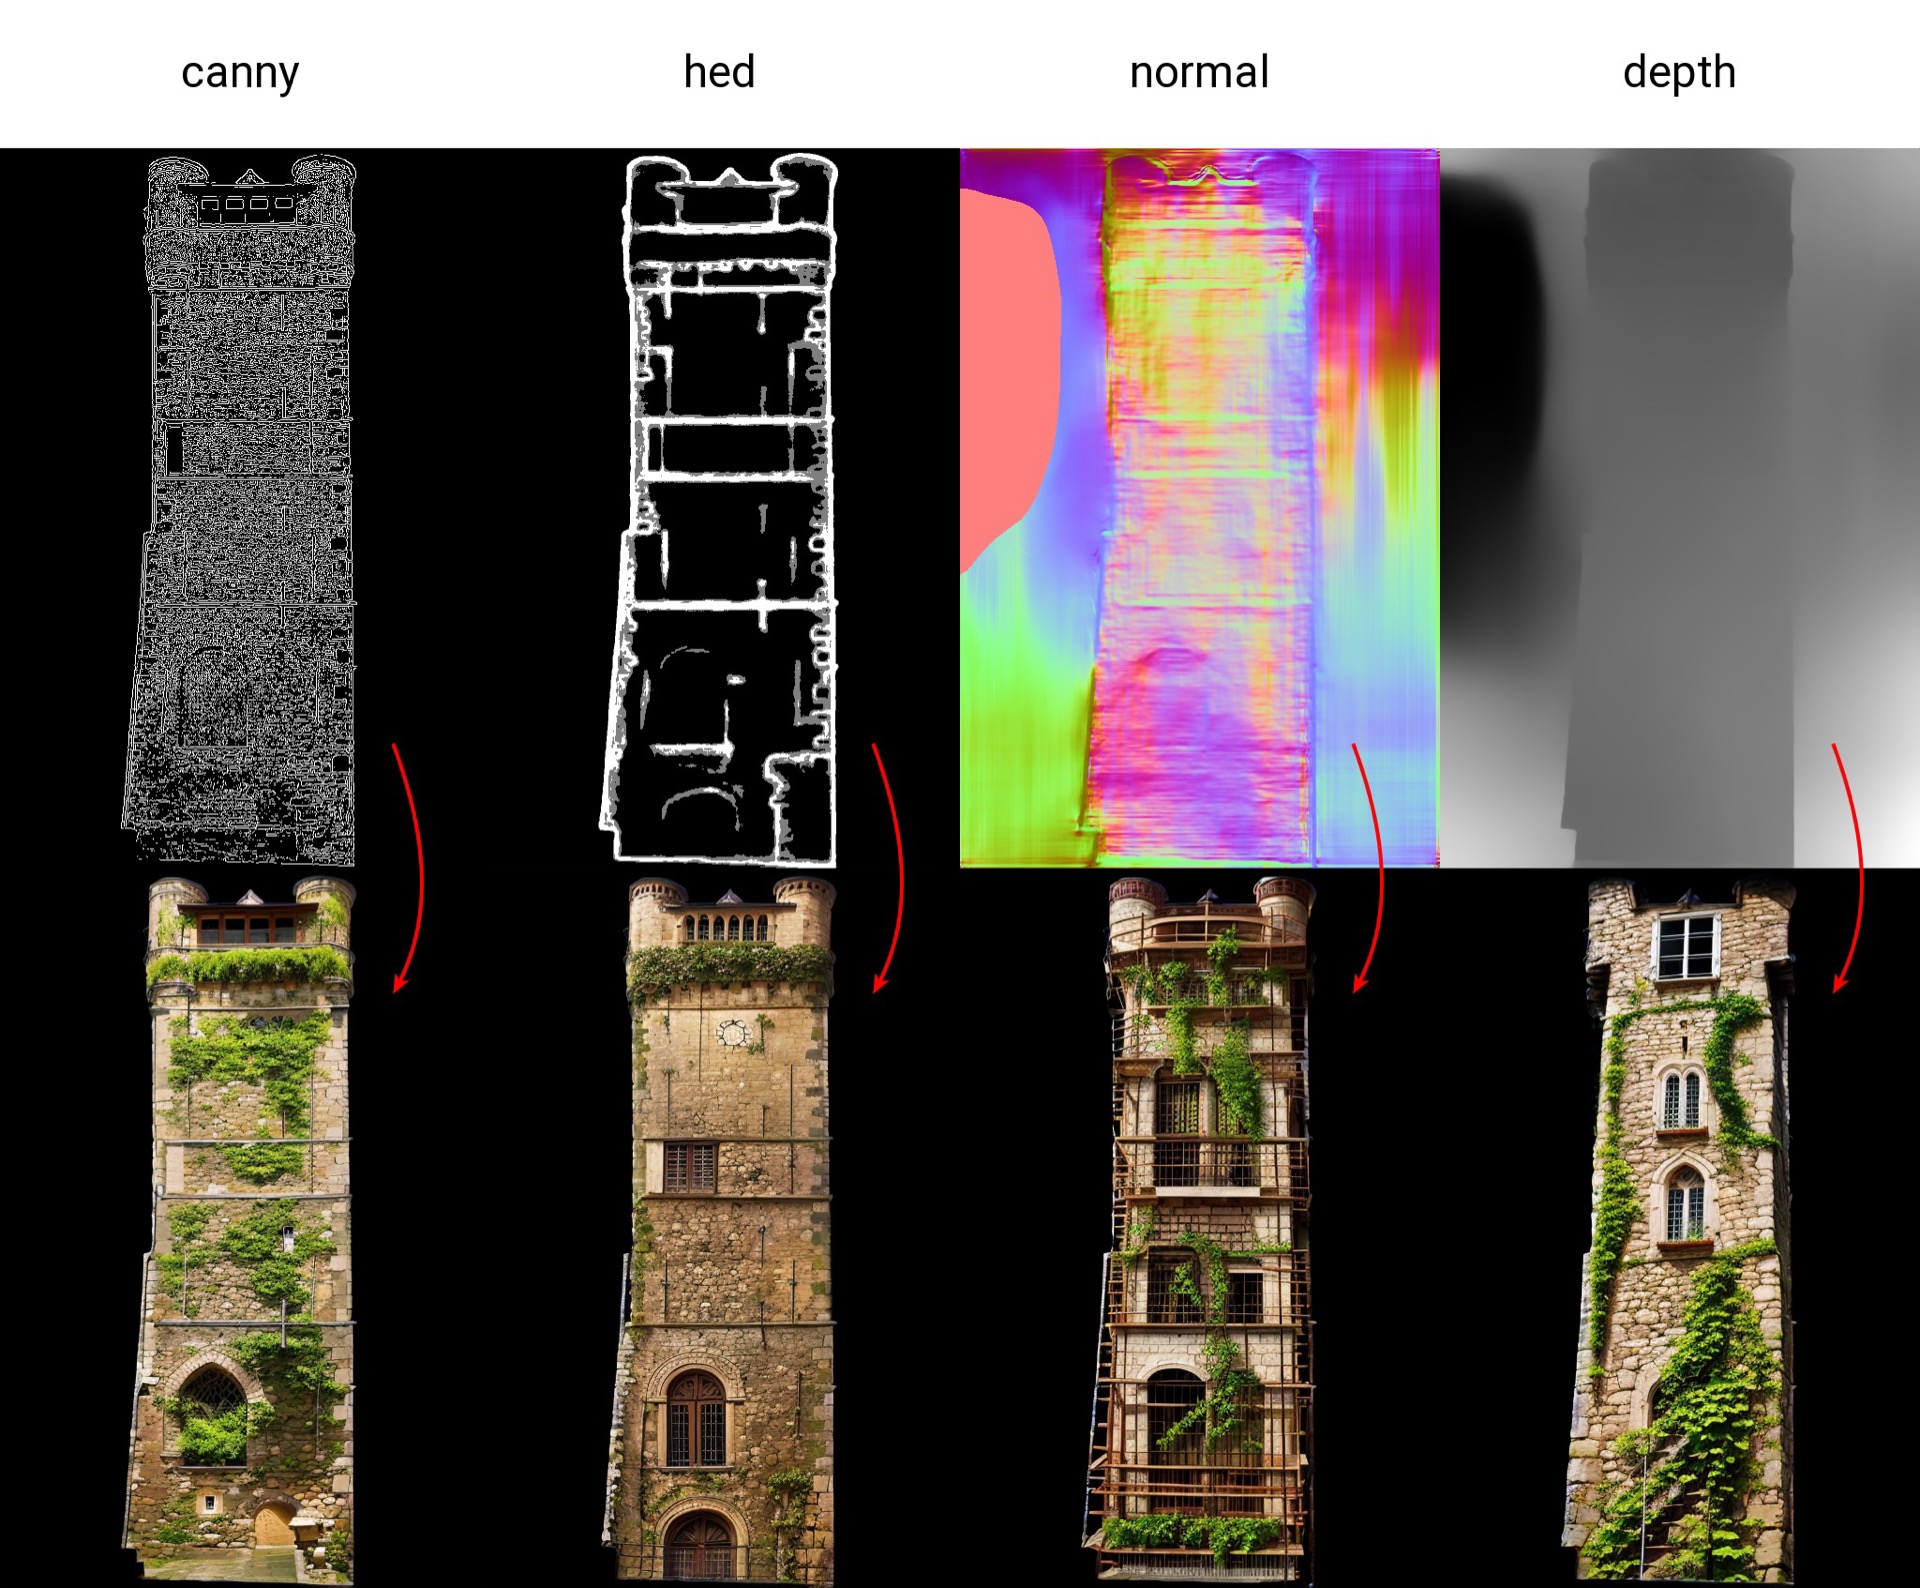
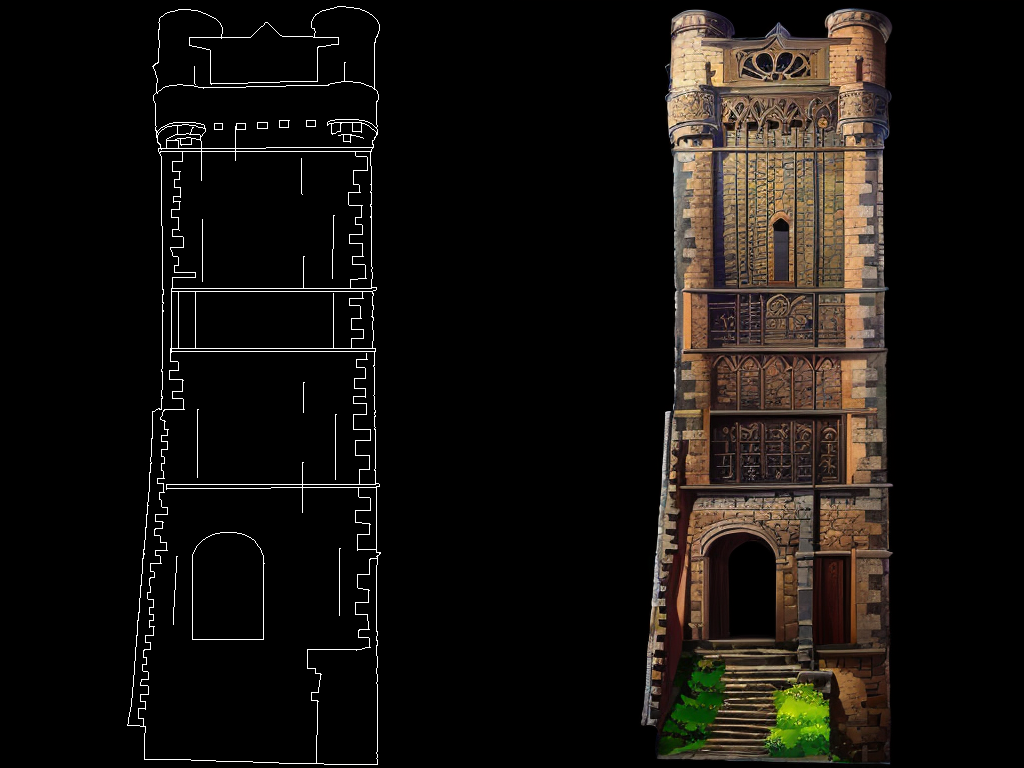
As you can see in the image above, the canny edge map that was auto-generated was way too detailed. I drew one manually using a 1 pixel pencil tool in Photoshop for better results.
A higher resolution
The outputs from the Dreamshaper SD 1.5 based model were just 512x768 pixels. To reach the target resolution, it needed a 4x upscale. I tried going to a higher resolution with a Tiled upsampler, but the results were not satisfactory:
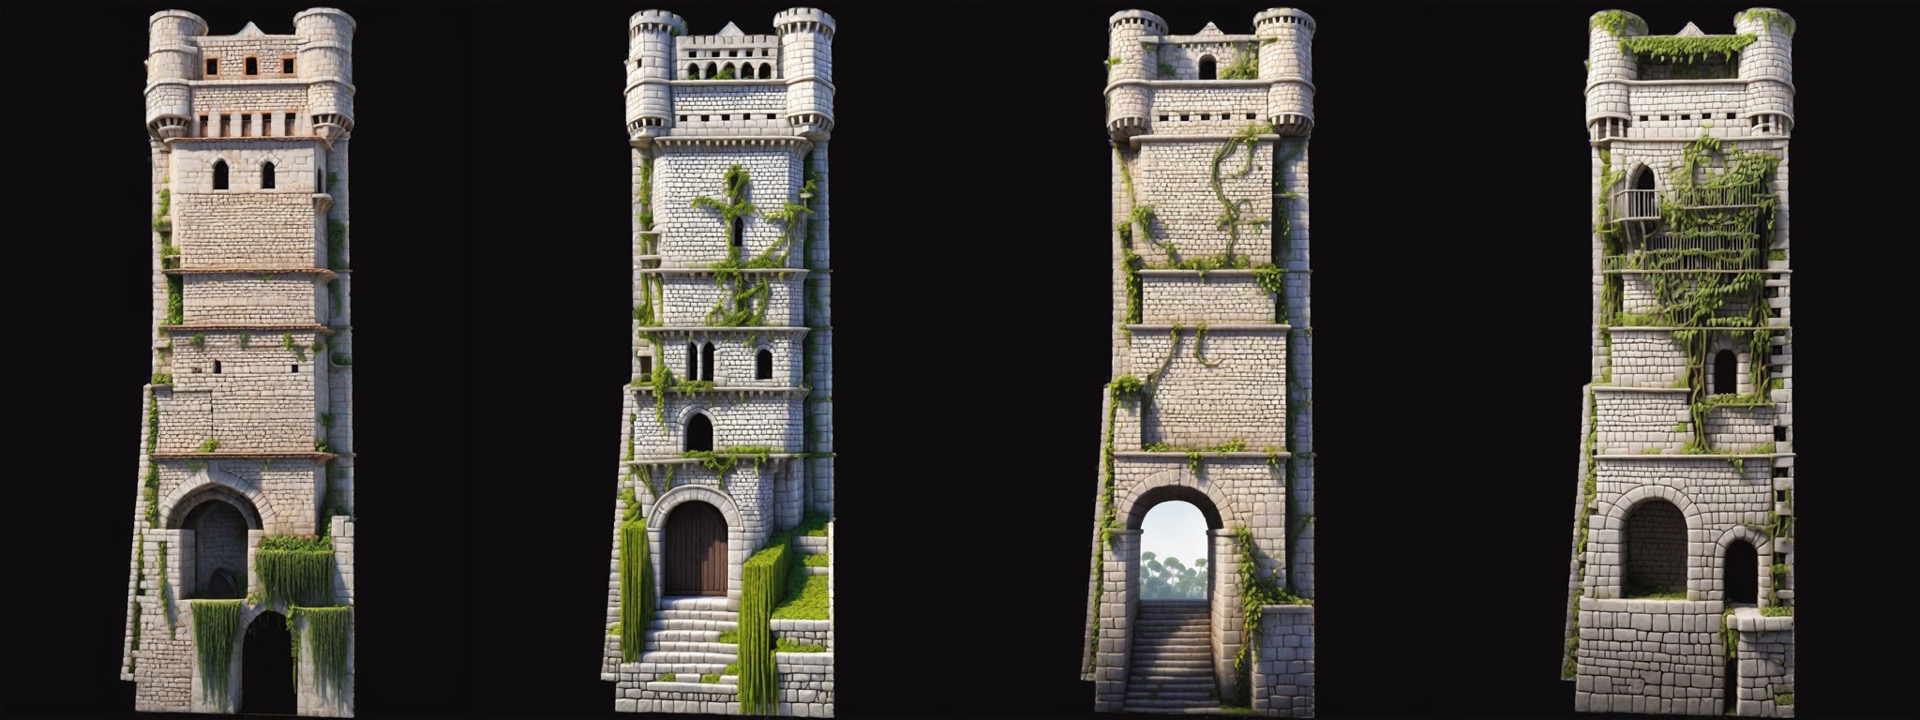
SDXL
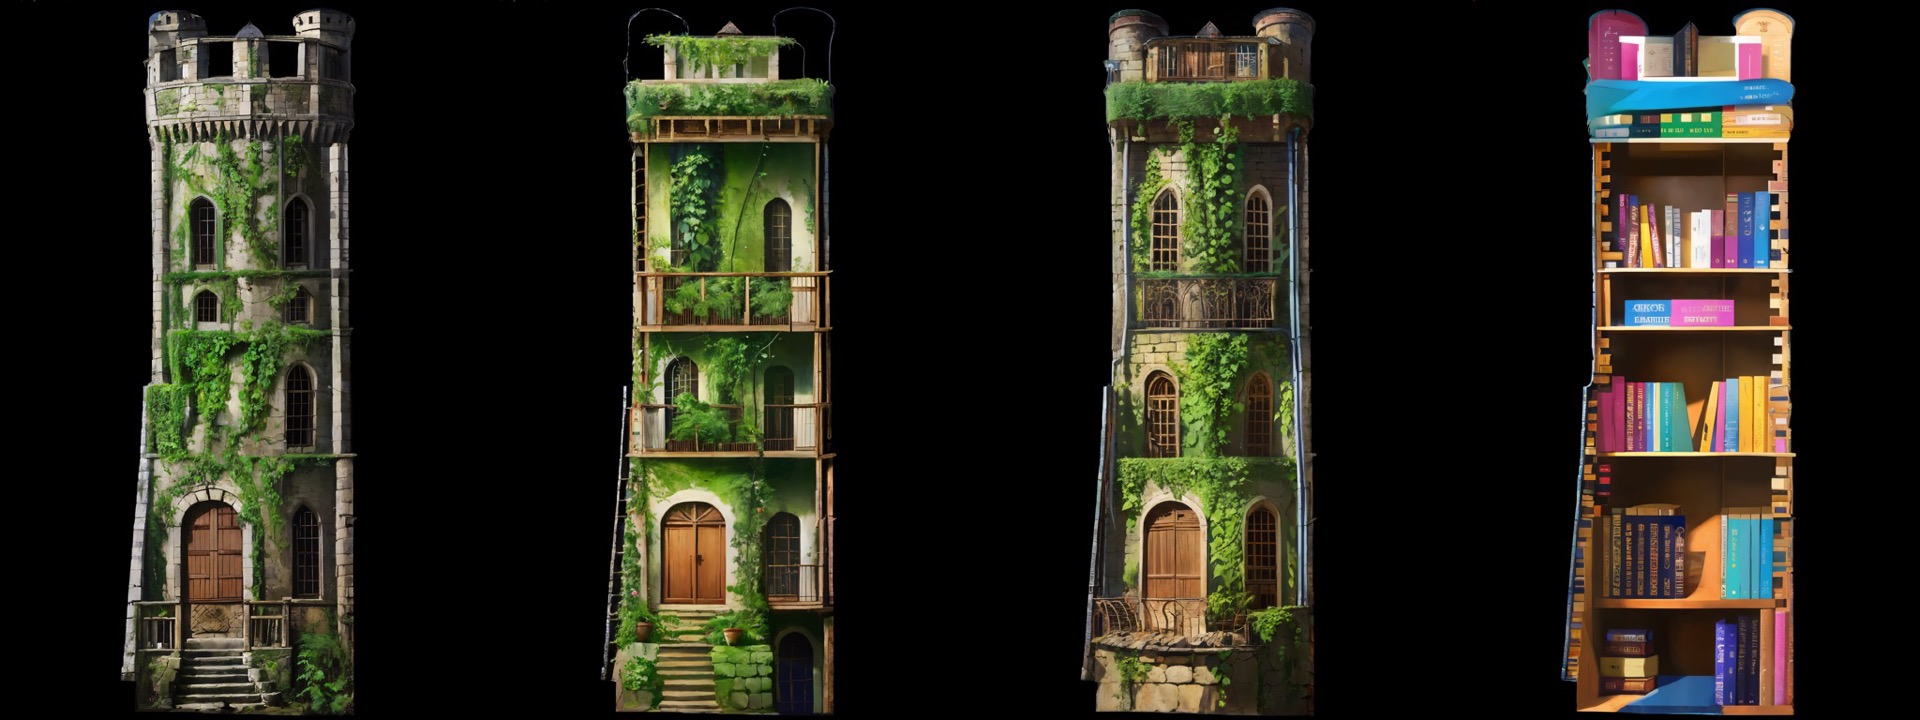
Luckely, we have SDXL, which has double the resolution of SD 1.5 based models. I picked the SDXL Unstable Diffusors Yamermix checkpoint, and generated a few samples. Using the same prompt, the out-of-the box results were already much better:
Creating prompts
Our goal was to get diverse, interesting visual outputs. In order to do that, I needed good prompts. I wrote a couple of prompts, based upon examples on CivitAI, but also found the ComfyUI PromptStylers extension an interesting source of inspiration. Taking a look at the json files in that repo, helped constructing prompts.
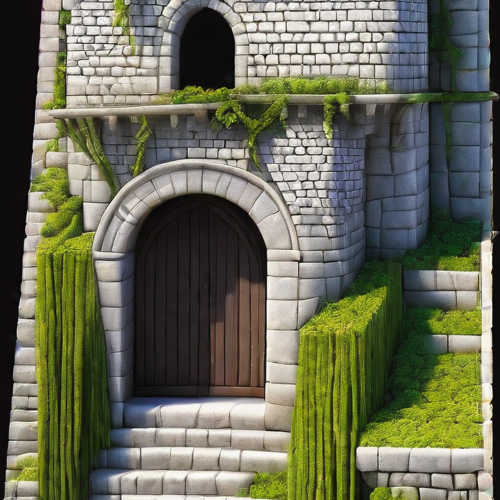
With some trial and error, I noticed I got the best results when the prompts started with “front view of a tower”
front view of a tower, Capture the ambiance of a Parisian café, with people leisurely enjoying coffee and conversation at outdoor tables, emphasizing the play of light and shadow.
In order to schedule and execute the prompts automatically, I merged the interesting positive and negative prompts into a JSON file, and used a Python script that constructed various prompts and sent them to the ComfyUI API endpoint.
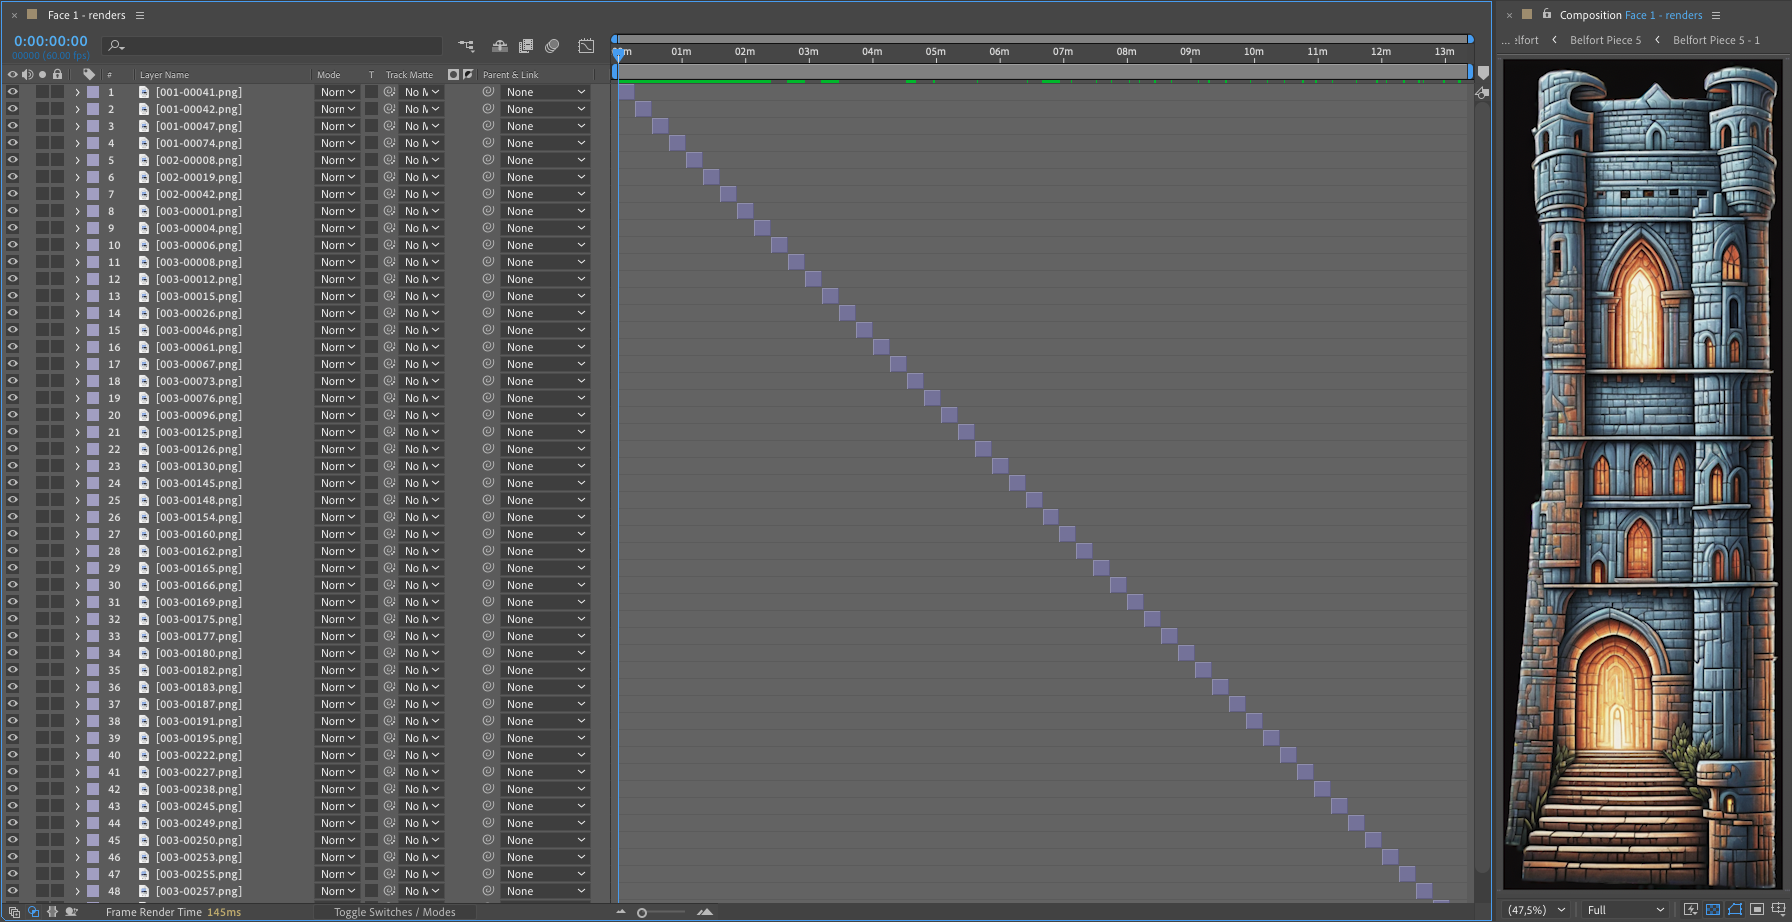
This way, we generated an initial set of +1500 images:
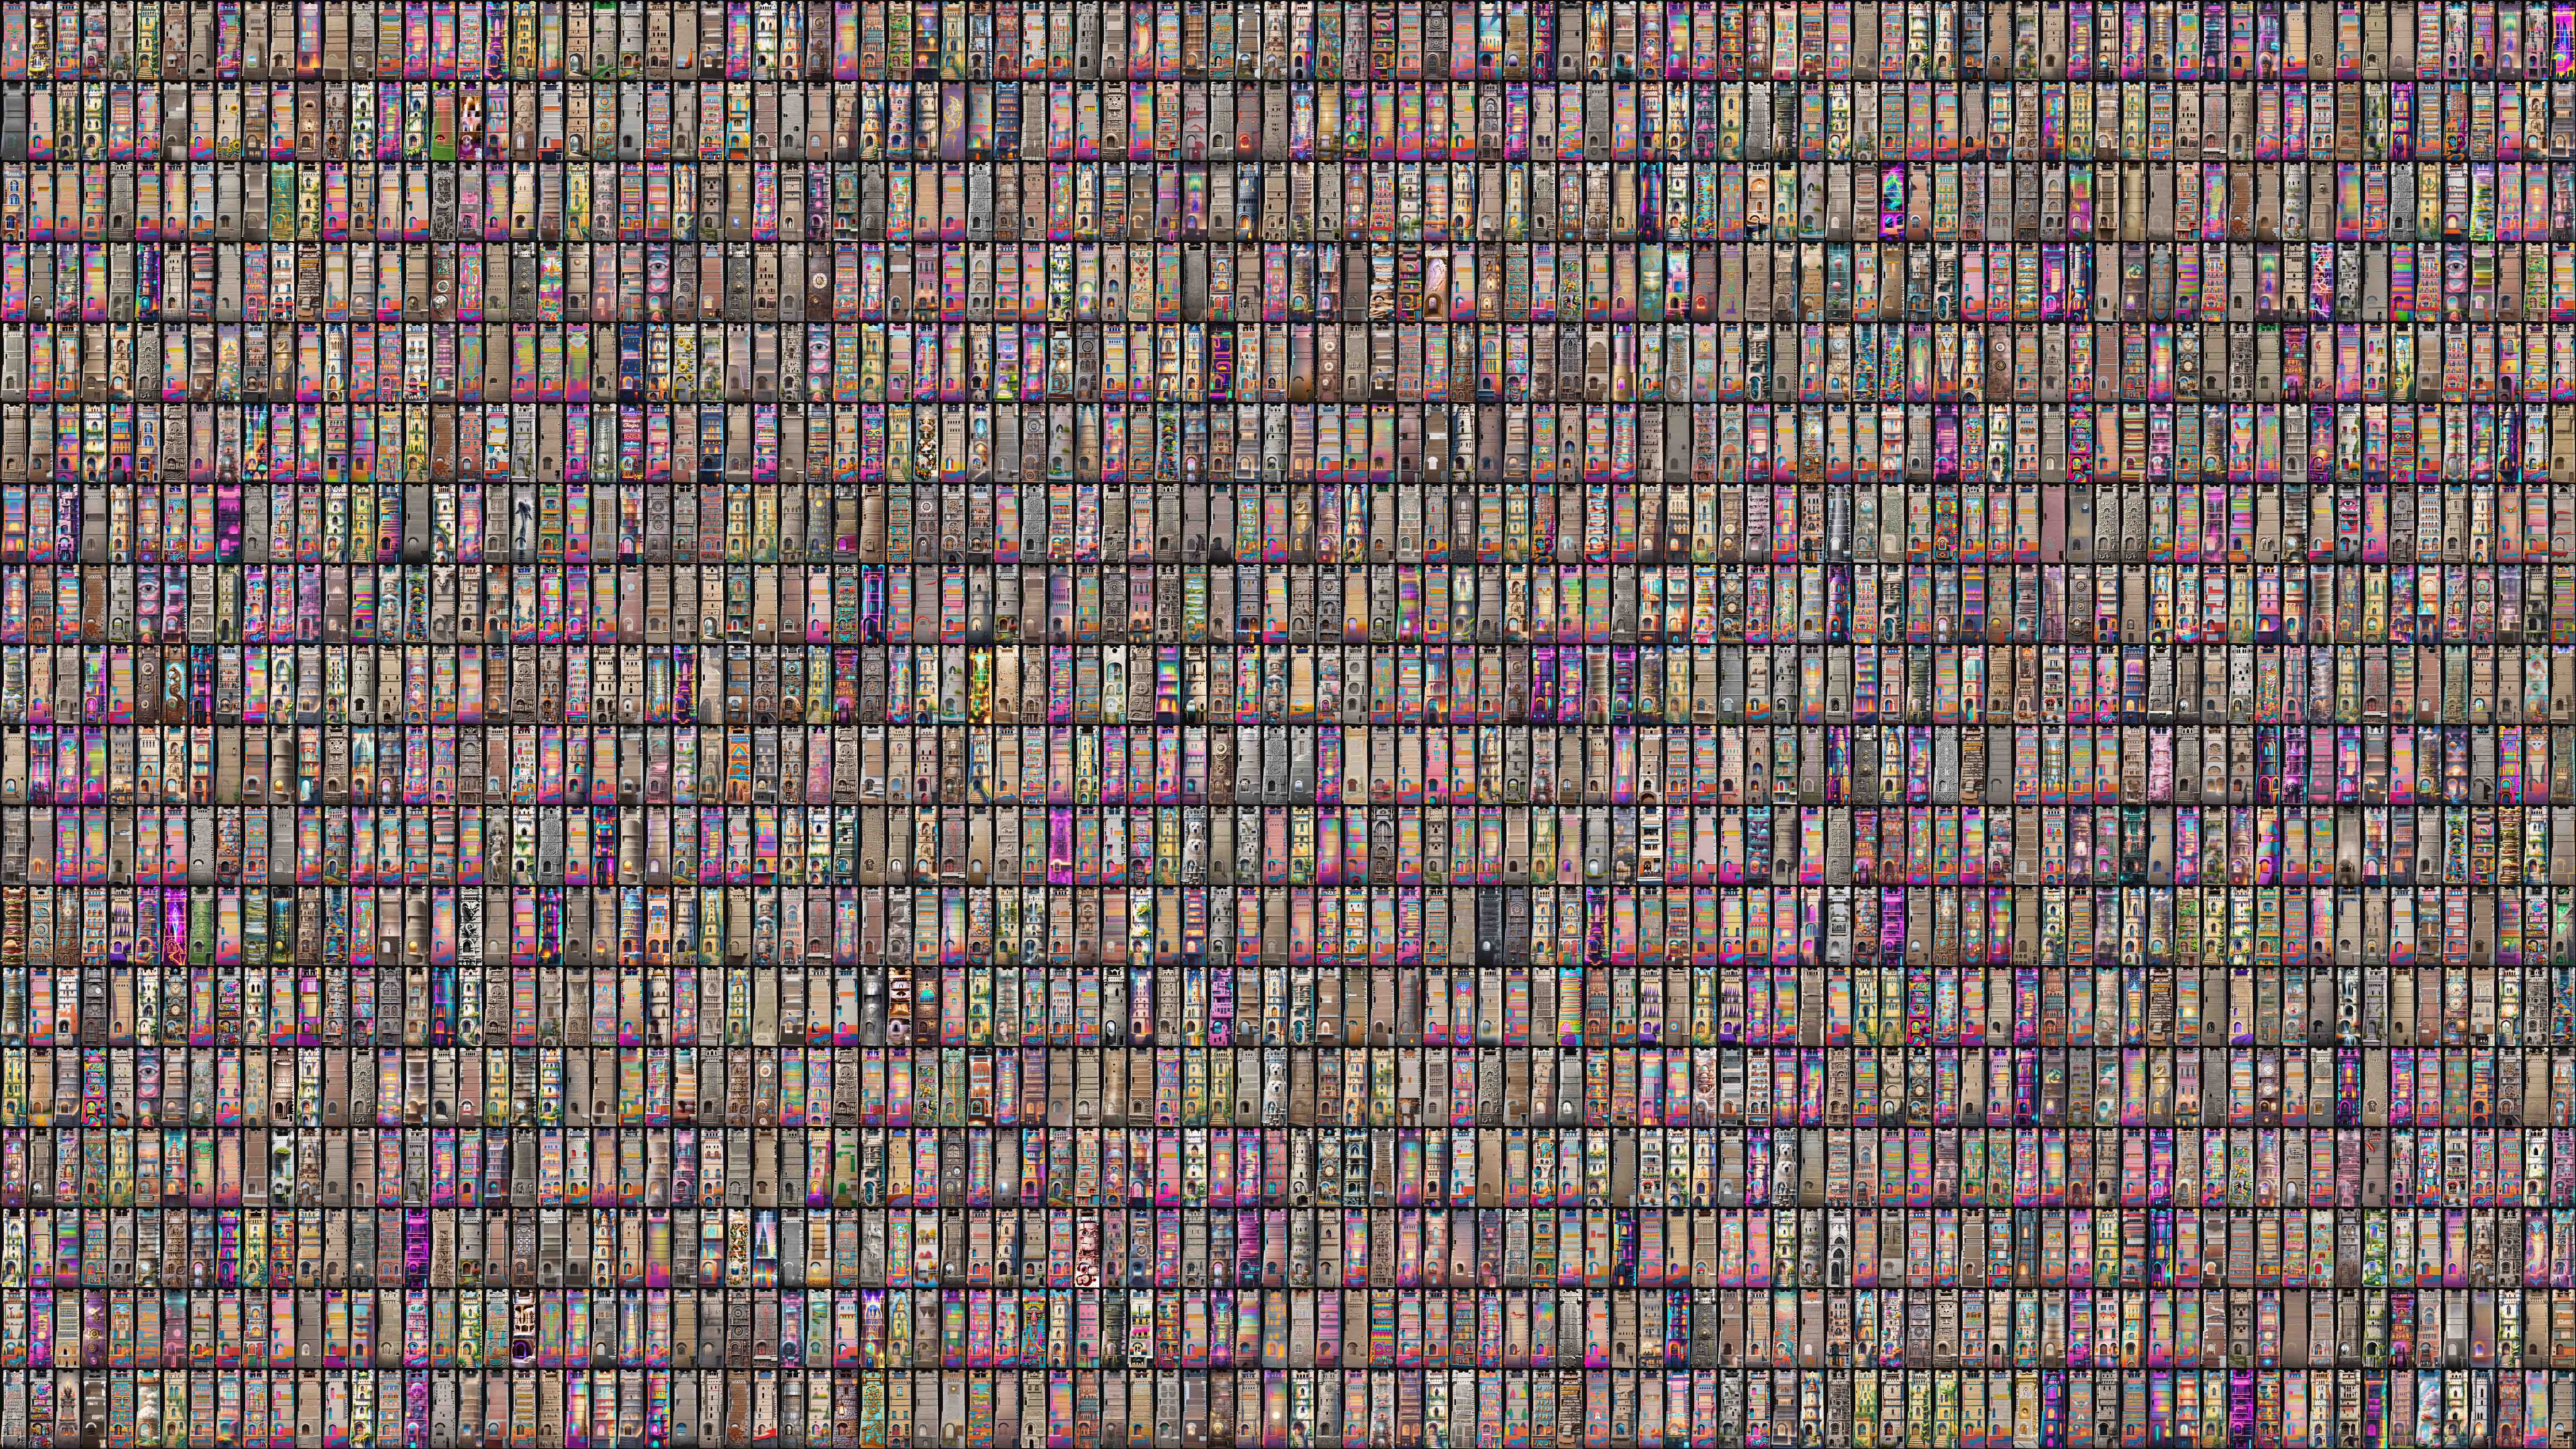
After a manual curation of the images, we ended up with 200 images which we thought would look nice on the building.
Animating between buildings
We wanted a little more than a simple slideshow to animate between the buildings. We played with animating in the latent space, but that looked cluttered.
Time for After Effects wizard Frédéric Baert to step in. The building has some interesting horizontal lines, and one of my colleagues suggested a “Rubiks cube” effect as a transition.
Creating this animation for 200 different images would be a lot of manual work with little to no flexibility for changes, so we thought of a workflow that could be automated as well.
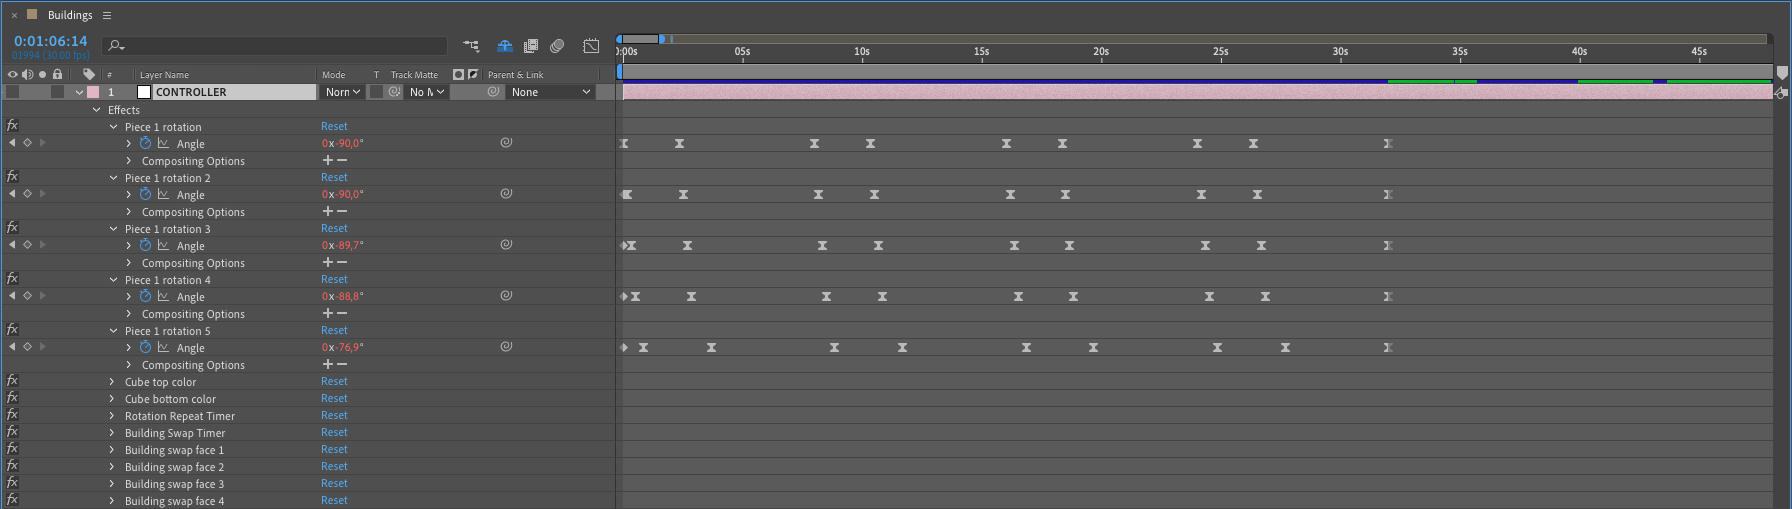
Utilizing the structure of the building itself, it was segmented into five distinct parts. Each of these parts was gradually rotated. To facilitate this rotation, we developed a basic rig with 3D layers using After Effects. Each layer was responsible for controlling the rotation of a piece, dictating the color of the top and bottom faces, recording the number of complete rotations made by the building, and determining when to transition to a different image. We accomplished this through the application of expressions.
The rotating of the building was animated with keyframes. It took 960 frames to do a full 360 degree rotation of the building. Let’s call this value animationLengthInFrames for future reference.
To create a script in AE to increase the value of a slider by 1, every x amount of frames, we can use this script:
countFrames = time/thisComp.frameDuration;
freq = countFrames / animationLengthInFrames;
repeatNumber = Math.floor(freq);
value = repeatNumber;
Every animationLengthInFrames the value would thus increase by 1. This value was stored on a slider called Rotation Repeat Timer.
Each of the faces also checked how many times the building has rotated before subtracting the new rotation values. The slider was animated with keyframes and looped endlessly with the loopOut function.
effect("Rotation Repeat Timer")("Slider") - effect("Piece 1 rotation")(1);
loopOut();
To easily change generated buildings in one go, we created a composition for each face where all the renders played sequentially. This method enabled us to effortlessly replace one rendered building with another, or even generate an additional 1000 buildings without disrupting the rig.
These compositions were then remapped in time with an expression to automatically switch with each full rotation of the building.
As a last small detail to give the building a bit more depth a light was added in the scene to emphasize the rotation effect.
Final Result
It was exciting to see the final result on the actual building. Here’s a short snippet of the footage in real life:
In the end we ended up with 25 minutes of AI generated content. You can see it in real life each evening between 7pm and 12pm, until the 5th of November 2023.