Creating your own Dreambooth inpainting model
Inspired by the deepfake model of one of my alumni Sabatino, I wanted to get my hands dirty with Dreambooth to generate my own deepfakes. Taking things a little further, my goal was to create a custom inpainting model, so I could replace peoples faces with my own. This blog post describes the steps I took to create my own inpainting model.
Training Dreambooth
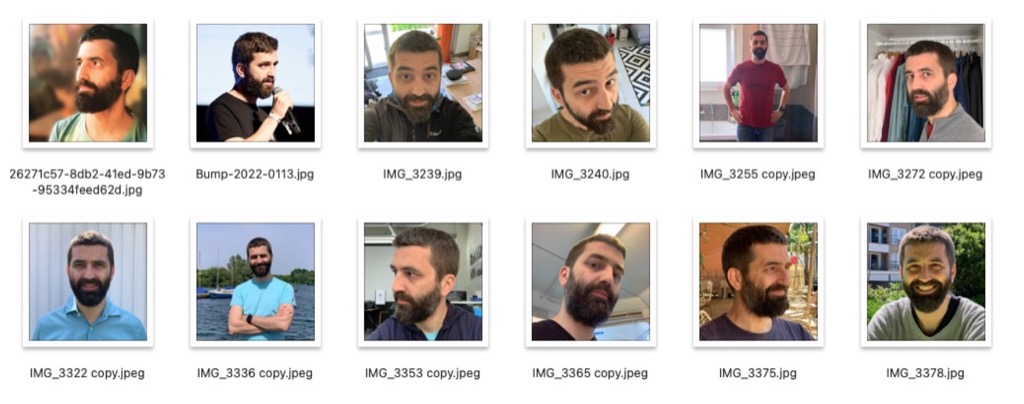
As a first step, you’ll need to train a Dreambooth model that generates images of you. I used the 1-click execution Colab, and fed it with 12 unique images of myself, with variation in backgrounds & poses.
I used the following settings to train my model:
- instance_prompt: photo of wvw man
- class_prompt: photo of a man
- training_steps: 2000
- learning_rate: 1e-6
After this first training step, it outputs some quick samples.
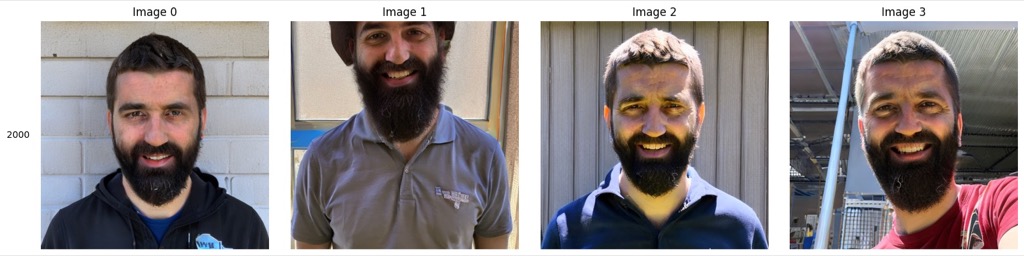
They aren’t too great, but with some prompting, you can get better results out of the model.
In the Colab cell below, you can start playing with your model. I tried the following prompt to generate some better samples

- prompt: wvw man, wearing leather jacket, studio portrait, vivid colors, highly detailed
- negative prompt: text, worst quality, low quality, jpeg artifacts, ugly, duplicate, morbid, mutilated, extra fingers, mutated hands, poorly drawn hands, poorly drawn face, mutation, deformed, blurry, dehydrated, bad anatomy, bad proportions, extra limbs, cloned face, disfigured, gross proportions, malformed limbs, missing arms, missing legs, extra arms, extra legs, fused fingers, too many fingers, long neck
The Colab will copy your custom model to your Google Drive (in a folder called Dreambooth_model), so you can use it later on.
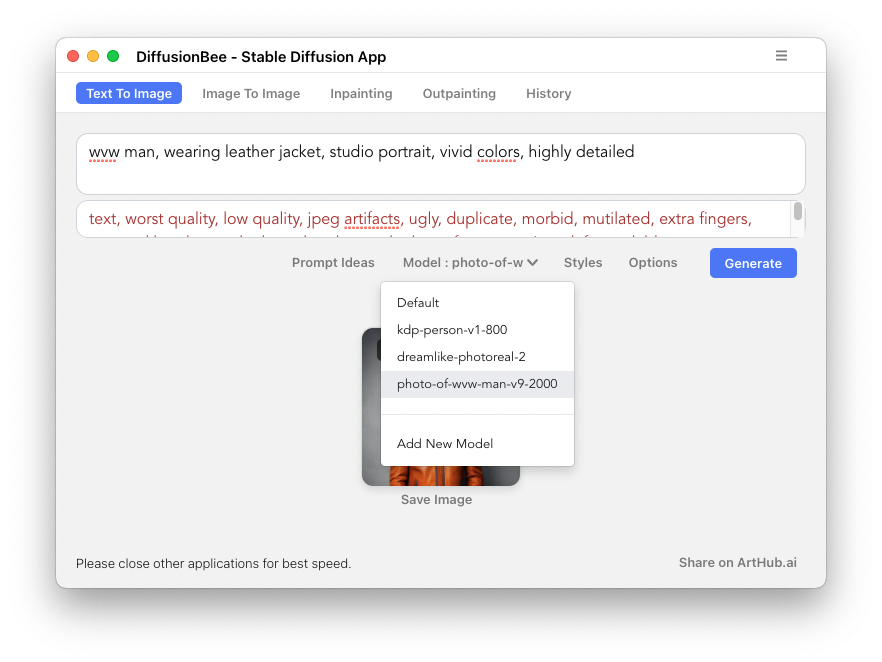
Optional: Testing the model locally using Diffusionbee
If you’ve got an Apple Silicon Mac, you can use Diffusionbee locally. This way you can play with Stable Diffusion models without having to use Colab (and spending cloud credits).
Download your model.ckpt file from your Google Drive, and add it to Diffusionbee (in the Diffusionbee setting). You can then select that model and play with it locally.
Creating an inpainting model
Our current model can generate images from a text prompt, but isn’t able to inpaint images. After searching for a way to do this, I stumbled upon this reddit post to turn any model into an inpainting model
While you can execute the first step (training your own model) on a free Colab account at time of writing, this second step requires a Colab Pro account, as you will need access to a higher RAM machine.
We will be using a Colab notebook to run stable diffusion webui. I found the camenduru/stable-diffusion-webui-colab repo to be a good source of up-to-date, working Colab notebooks. Look for a link to the stable_diffusion_1_5_webui_colab notebook.
Reading the Reddit post, we will need 3 additional models to be available in our Colab notebook:
- sd-1.5-inpainting (https://huggingface.co/runwayml/stable-diffusion-inpainting)
- your custom model
- v1.5-pruned (https://huggingface.co/runwayml/stable-diffusion-v1-5)
To add these models, I added the following 3 lines of code before the python launch command (make sure to correct the first line to the path of your custom model):
%cp /content/drive/MyDrive/Dreambooth_model/wvw-man-v9-2000/model.ckpt /content/stable-diffusion-webui/models/Stable-diffusion/wvw-man.ckpt
!wget https://huggingface.co/runwayml/stable-diffusion-inpainting/resolve/main/sd-v1-5-inpainting.ckpt -O /content/stable-diffusion-webui/models/Stable-diffusion/sd-v1-5-inpainting.ckpt
!wget https://huggingface.co/runwayml/stable-diffusion-v1-5/resolve/main/v1-5-pruned.ckpt  -O /content/stable-diffusion-webui/models/Stable-diffusion/v1-5-pruned.ckpt
Run the Colab, and wait for the webui server to launch (it’ll take a while…). You can then open the webui in your browser, and navigate to the Checkpoint merger tab. There, you can use the settings recommended in the Reddit post:
- Primary model: sd-v1-5-inpainting
- Secondary model: YOUR MODEL FROM THE PREVIOUS STEP
- Tertiary model: v1-5-pruned
- Multiplier: 1
- Interpolation Method: Add difference
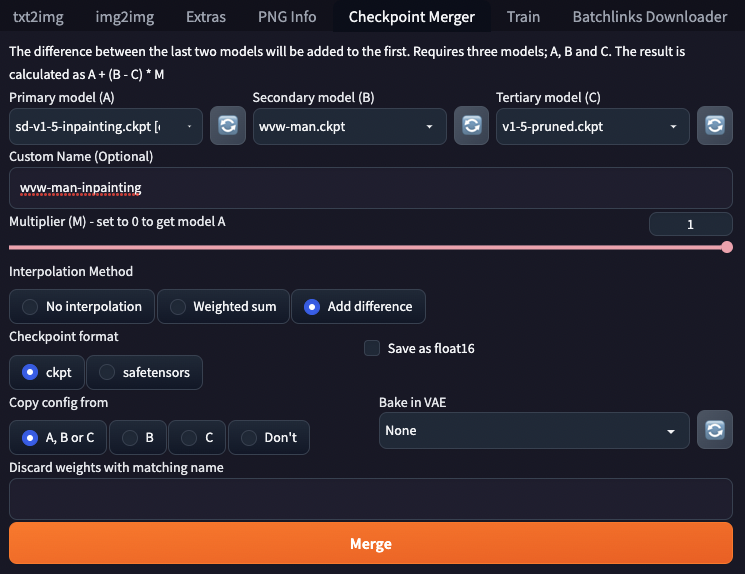
Click the Merge button and wait for it to finish. It’ll save your custom inpainting model to the /content/stable-diffusion-webui/models/Stable-diffusion/ folder of your Colab.
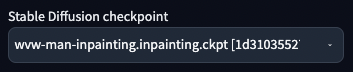
Once the model is in the folder, you can use it in the webui. You should be able to select it in the Stable Diffusion checkpoint dropdown at the top.
Navigate to the img2img tab, and upload an image you want to inpaint and mask out the area you want to replace. Make sure to set the resize mode to “Crop and resize”, the inpaint area to “Only masked”, set the Sampling method to DDIM, enter a prompt and hit generate. You might need to hit generate a few times before you get a good result.
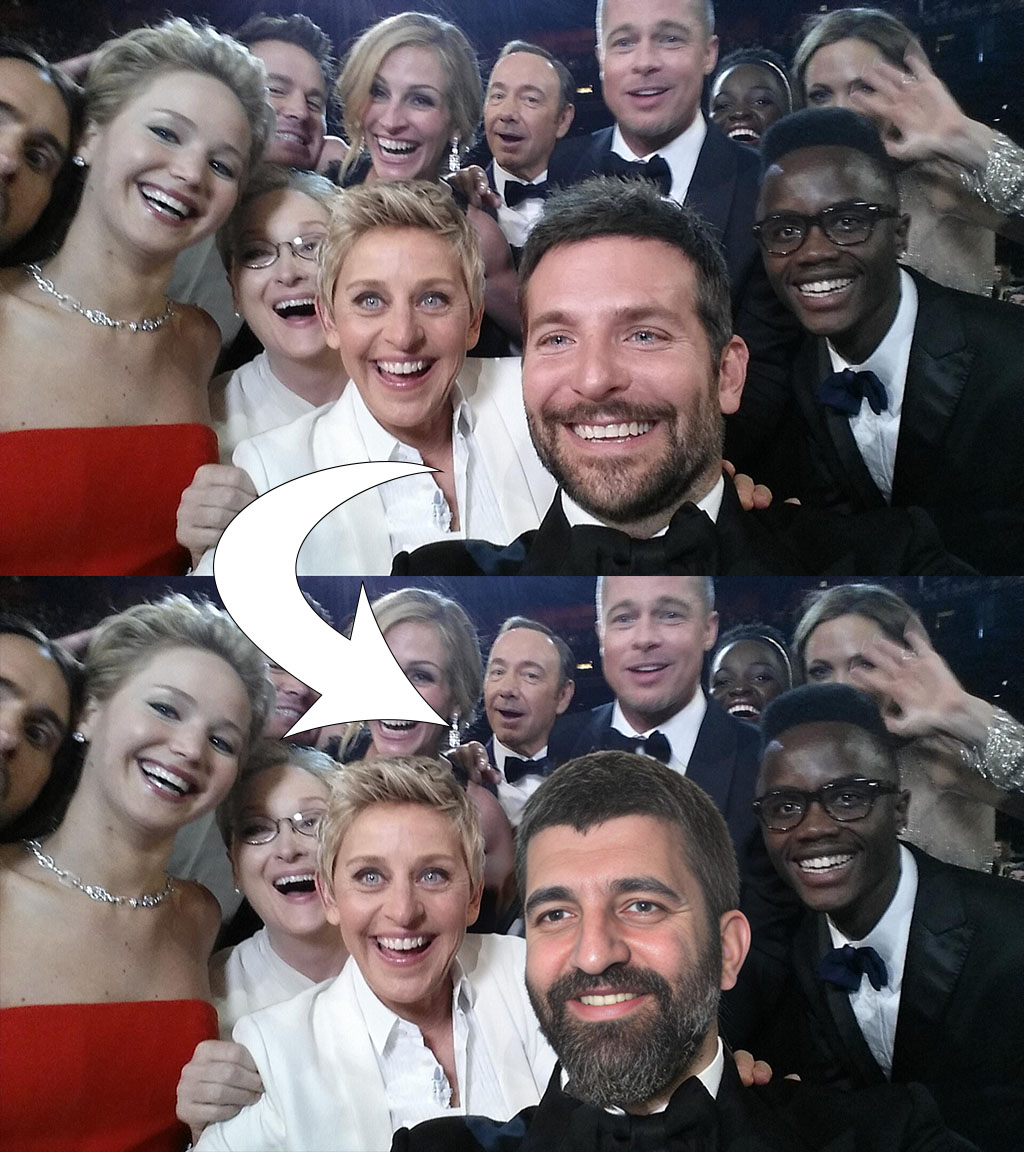
Here’s a short video of the inpainting model in action: